A 3D printing timelapse reduces hours of printing into a few minutes or seconds, and you watch the print gradually take shape layer by layer; it’s like the layers are growing out of the print bed. This is a satisfying and enjoyable process and they are perfect for sharing on social media to showcase your project. Creating a 3D printing timelapse is not as difficult as it might seem, but it does require some preparation and the right tools. You need to have any of the best 3D printers and a few other things, which we have listed below.
What You Need to Create a 3D Printing Timelapse
Besides a 3D printer and a filament, you also need the following to create a 3D printing timelapse.
1. A Raspberry Pi: We will use Raspberry Pi 5 in this article. You can buy the kit on Amazon which comes with the Raspberry Pi, MicroSD card, power supply, and Micro HDMI. If you don’t have a Raspberry Pi, we shall also show you how to create timelapses using Cura’s timelapse plugin.
2. Camera: You can use a standard DSLR, smartphone camera, Raspberry Pi camera, or a webcam. When choosing a camera, consider the resolution, image quality, and mounting options. If you are using a DSLR camera or your smartphone, you must also have a stand.
3. Octolapse: Octoprint plugin that allows you to create timelapses.
4. Remote camera shutter: To trigger the camera to take pictures.
Once you have the above components, follow the steps below.
1. Prepare Your Environment
Prepare Your Environment
Ensure you place your 3D printer where there is good and consistent lighting to help enhance the quality of the final video. Avoid flickering or changing light sources, and ensure the light evenly illuminates the build area and should not be too low or too bright. In addition to lighting, the 3D printer should be on a stable surface to minimize vibrations that can affect the camera’s focus. You should also position your camera to capture the entire print without having some areas cut. This is important, especially if you are printing large or tall objects. You can also consider using a 3D printer enclosure.
If you use a webcam that doesn’t have a stand, you need to 3D print one. T-slot V-slot Universal camera mount designed by RaffoSan is a great option to download and 3D print. It also supports a wide variety of webcams and Raspberry Pi Cameras. Flexible webcam mount by TeachingTech is also a great option that you can 3D print. It suits most 3D printers and cameras.
2. Create a Timelapse Using Octolapse, Raspberry Pi Camera, or Webcam
Create a Timelapse Using Octolapse, Raspberry Pi Camera, or Webcam
Octolapse is a plugin for OctoPrint and it has been designed purposely for creating timelapse videos of your 3D prints. It works by synchronizing each photo with each layer change, ensuring the print stays at the center and it removes any movement between the frames, ensuring the final video generated looks like it magically appears layer by layer. The Raspberry Pi camera comes in several versions, and any of them can help you create timelapses. But you need to invest in a longer cable as the one that comes with the camera is too short. You can get one on Amazon for $6. Webcams come in different types, and you can buy one on Amazon.
Let’s now get to the step-by-step process.
1. Download and install Raspberry Pi Imager to your computer. It’s available for Windows, MacOS, and Linux. You can also check out our article on setting up a Raspberry Pi for the first time.
2. Insert an SD card on your computer.
3. Choose your device in the Raspberry Pi Device section. For my case, I will choose Raspberry Pi 5.
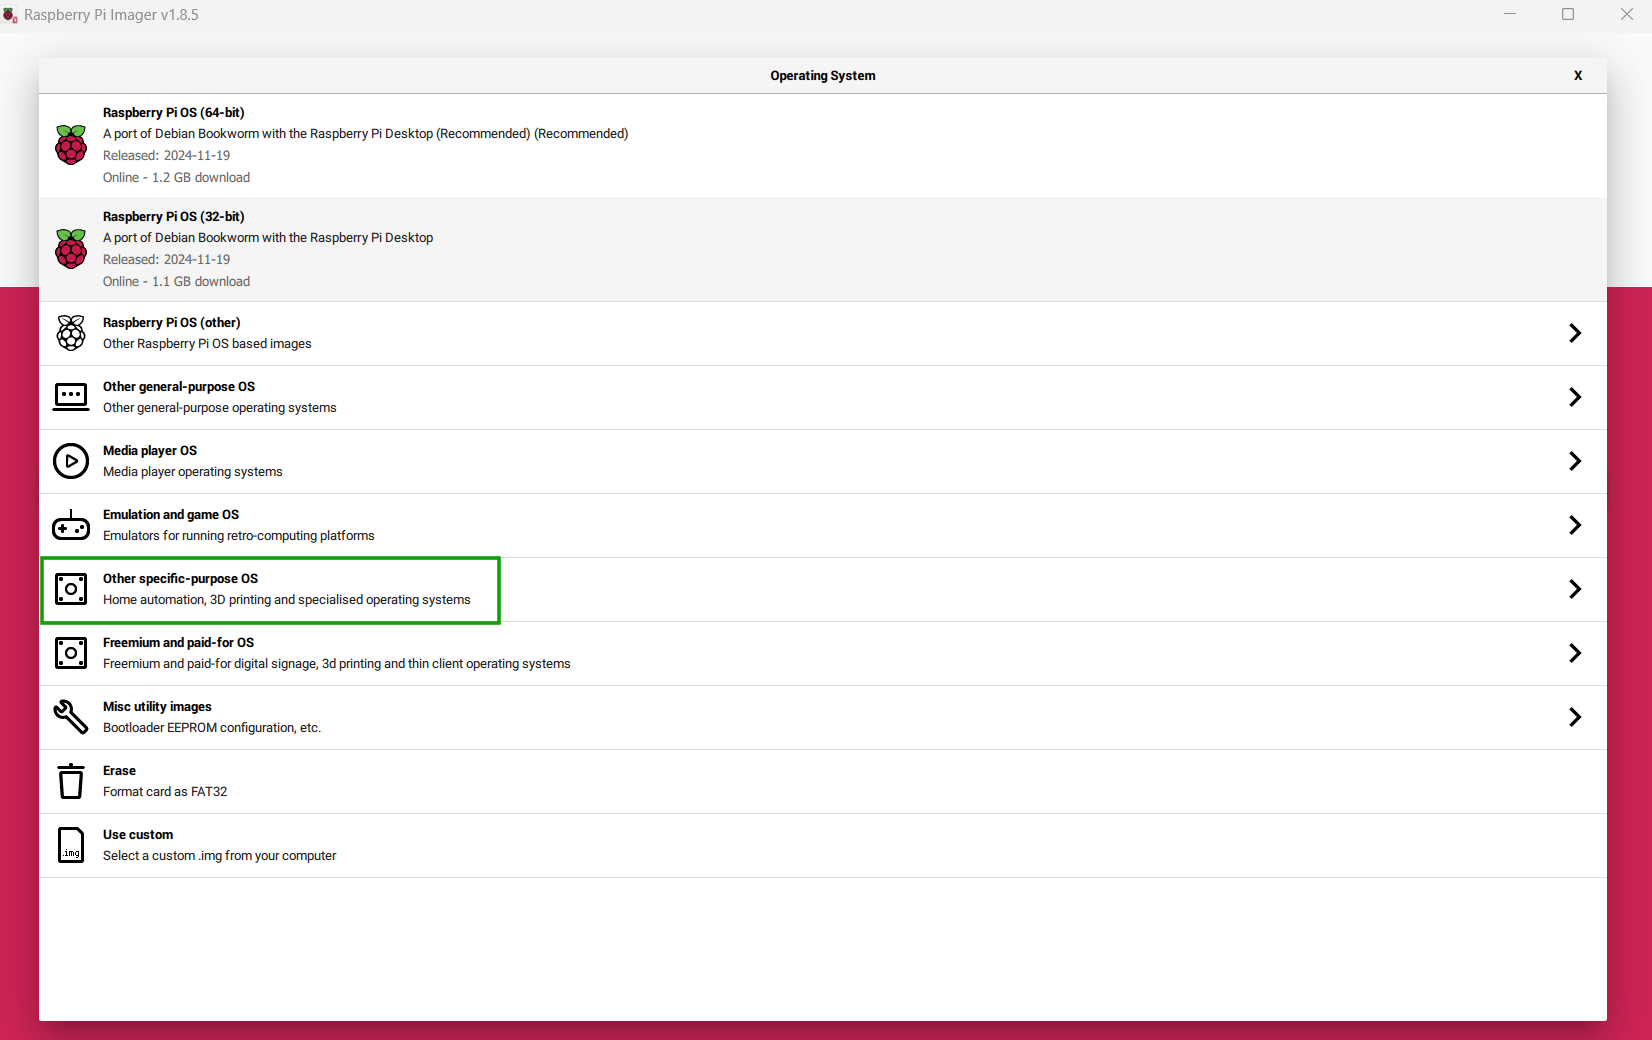
4. Go to Choose OS section and click Other specific-purpose OS.
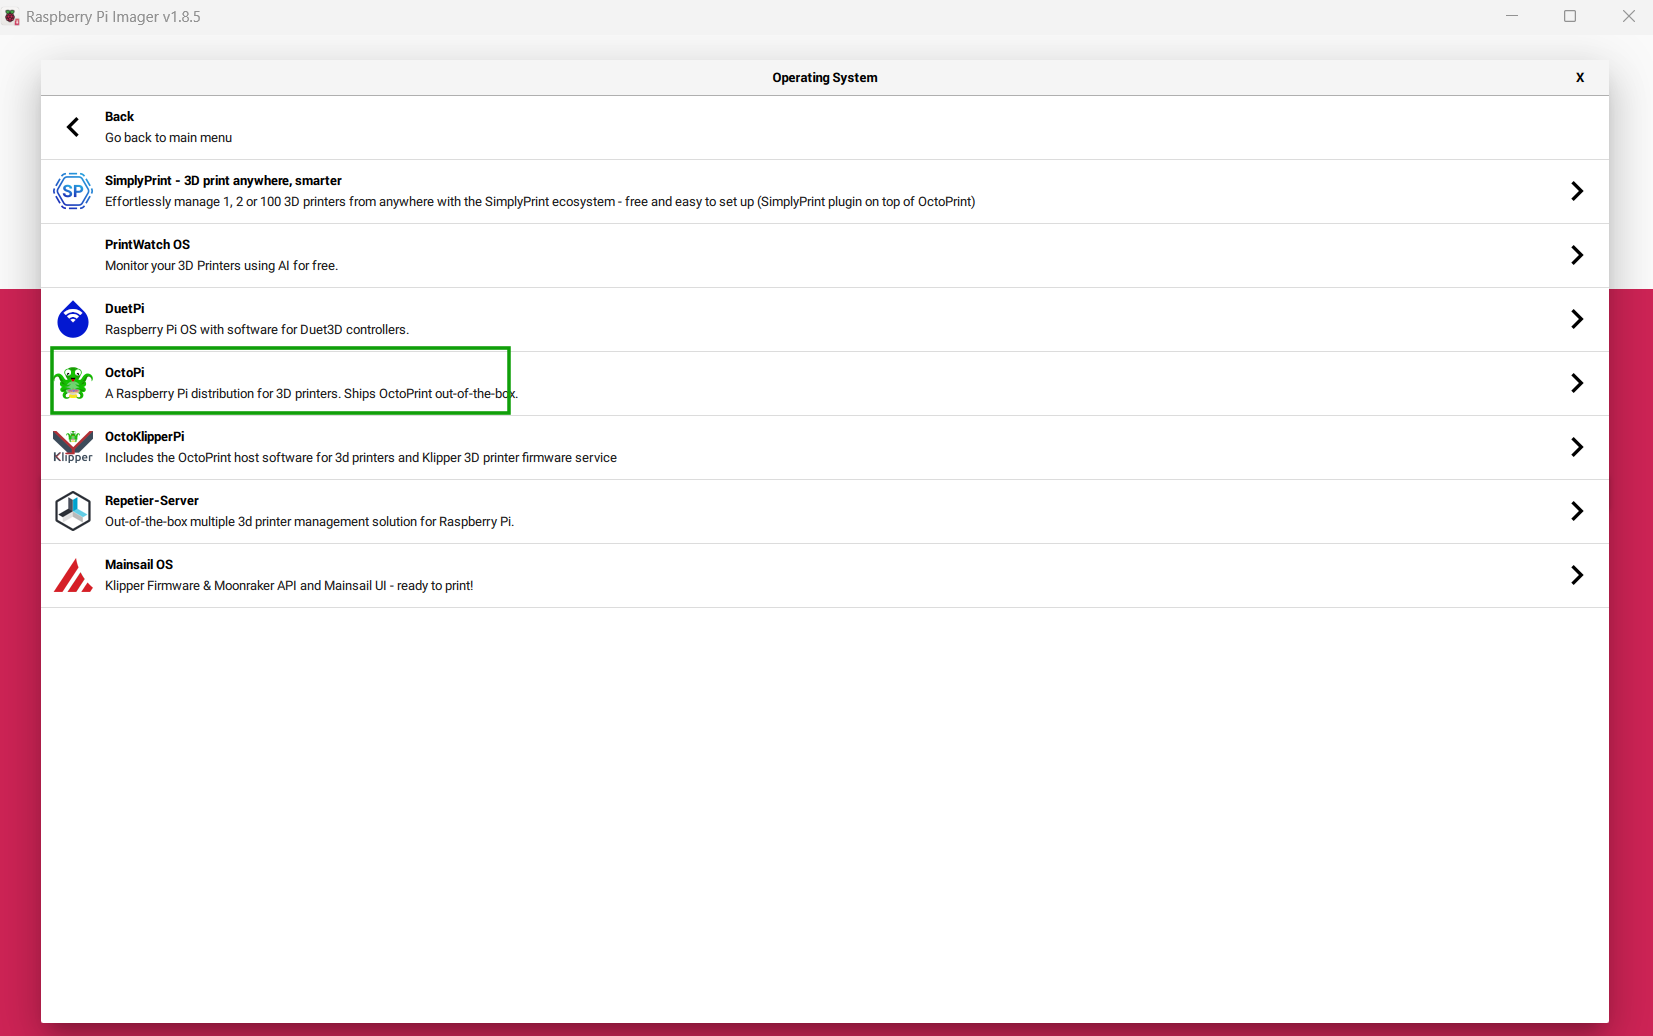
5. Go to 3D printing > OctoPi. You will be able to access the latest version of OctoPi. In my case, I didn’t find it as I am using Raspberry Pi 5 and currently, it’s not supported and one needs to install it manually instead. But if you are using other models, you should be able to access it. If you are using other Raspberry Pi models, follow the next steps.
6. Click OctoPi, then either choose the stable version or the new version with AI camera functionalities.
7. Choose your storage, then click NEXT.
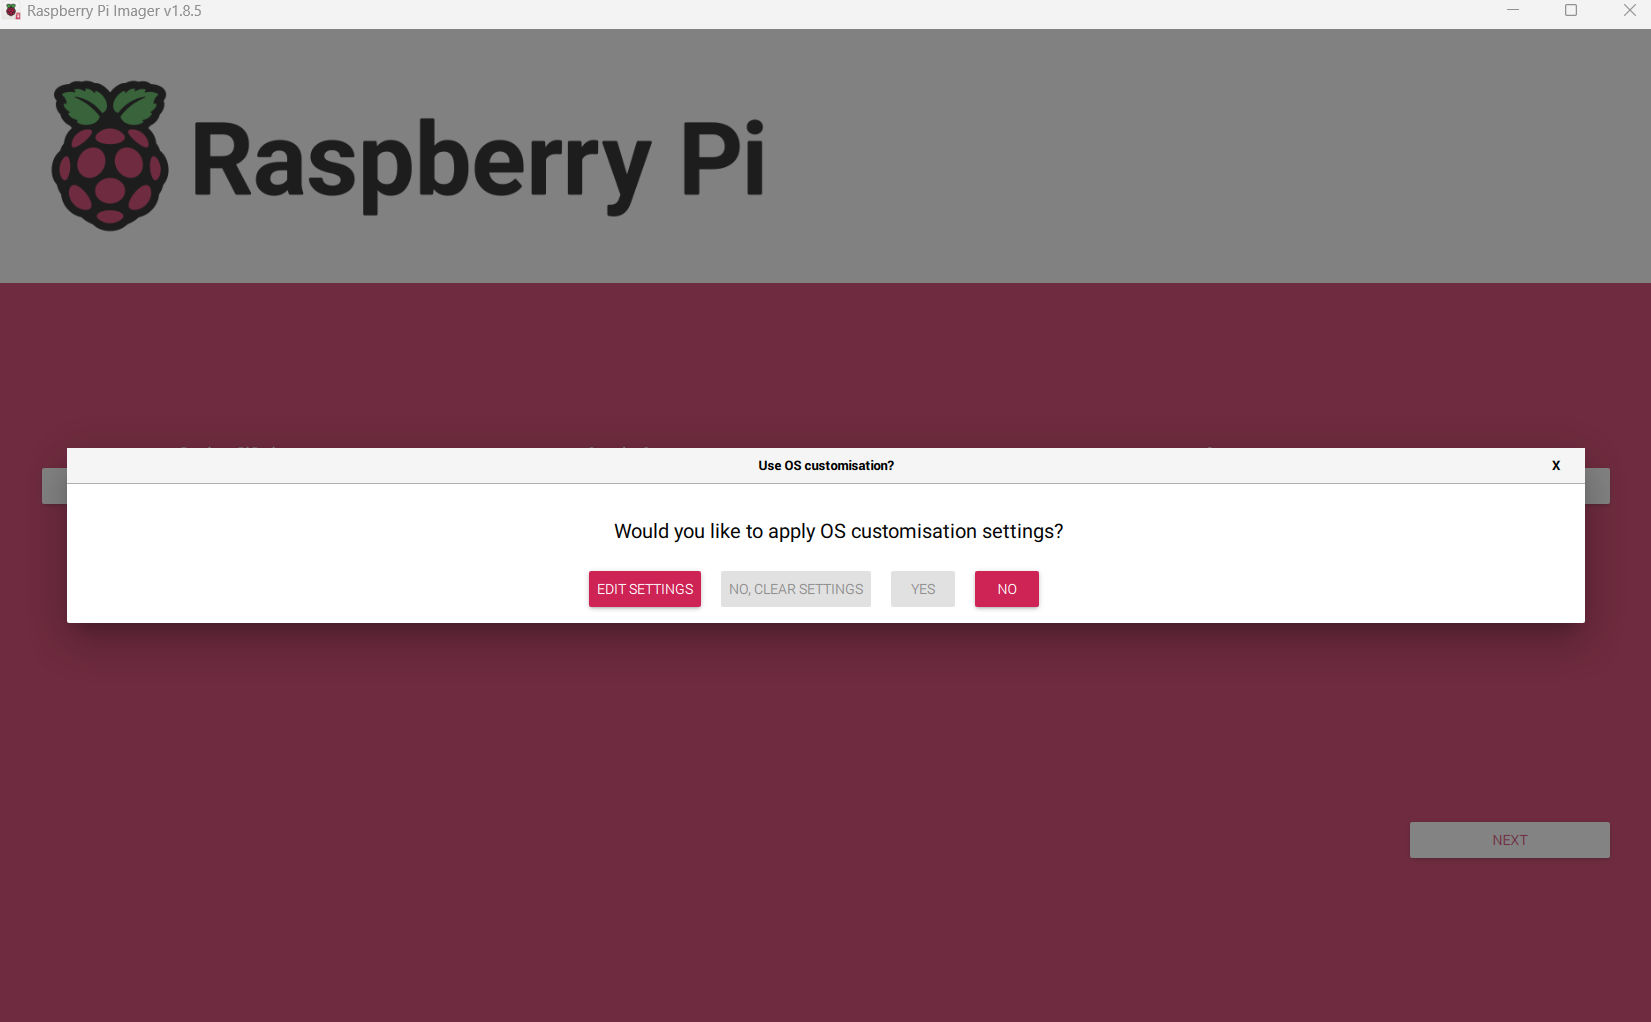
8. Choose whether to Edit settings or continue with the default in the new window that launches. You should edit the settings to add the system password and Wifi settings.
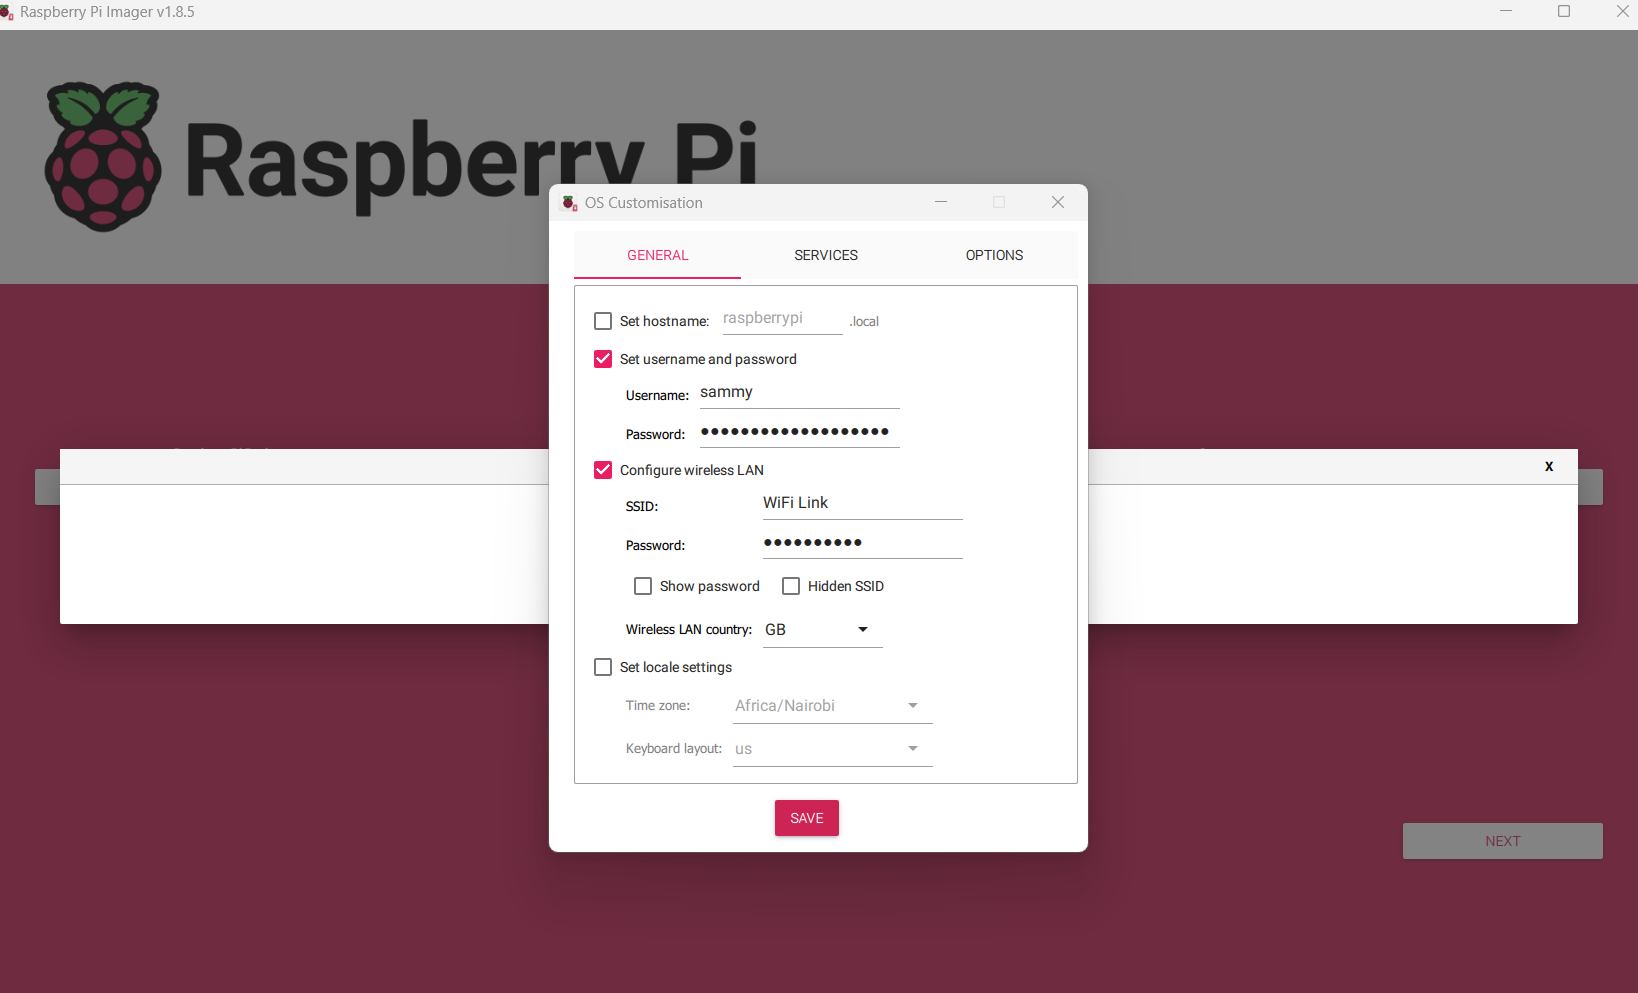
8. Click EDIT SETTINGS, then set up username and password and Wifi settings, then click Save.
You will then see a window asking you whether to apply the OS customization settings or not. Choose YES.
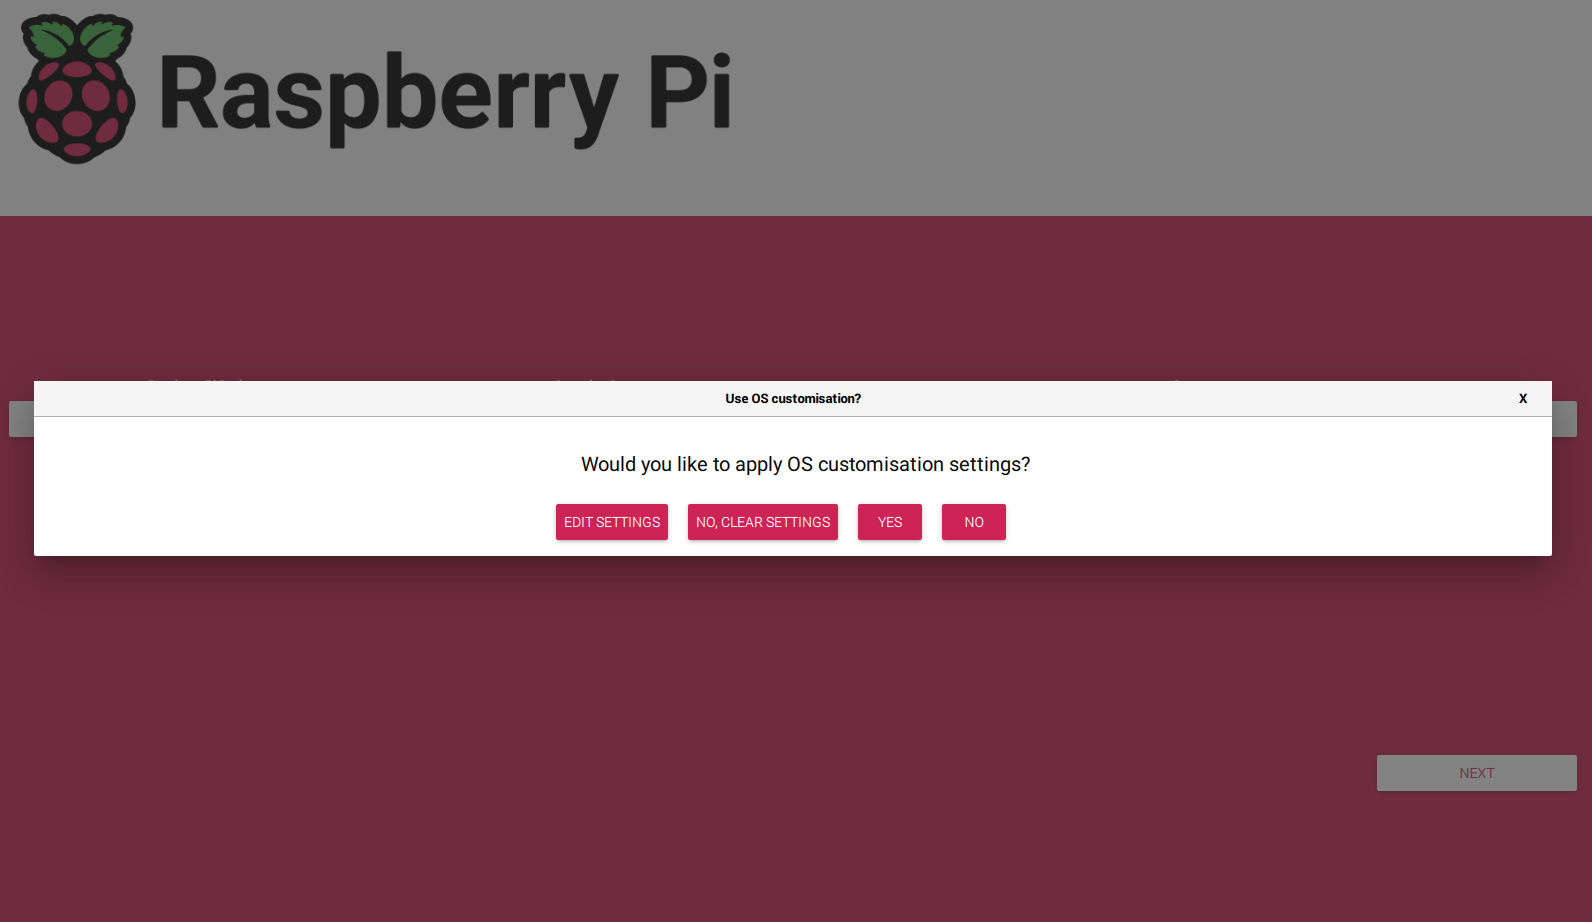
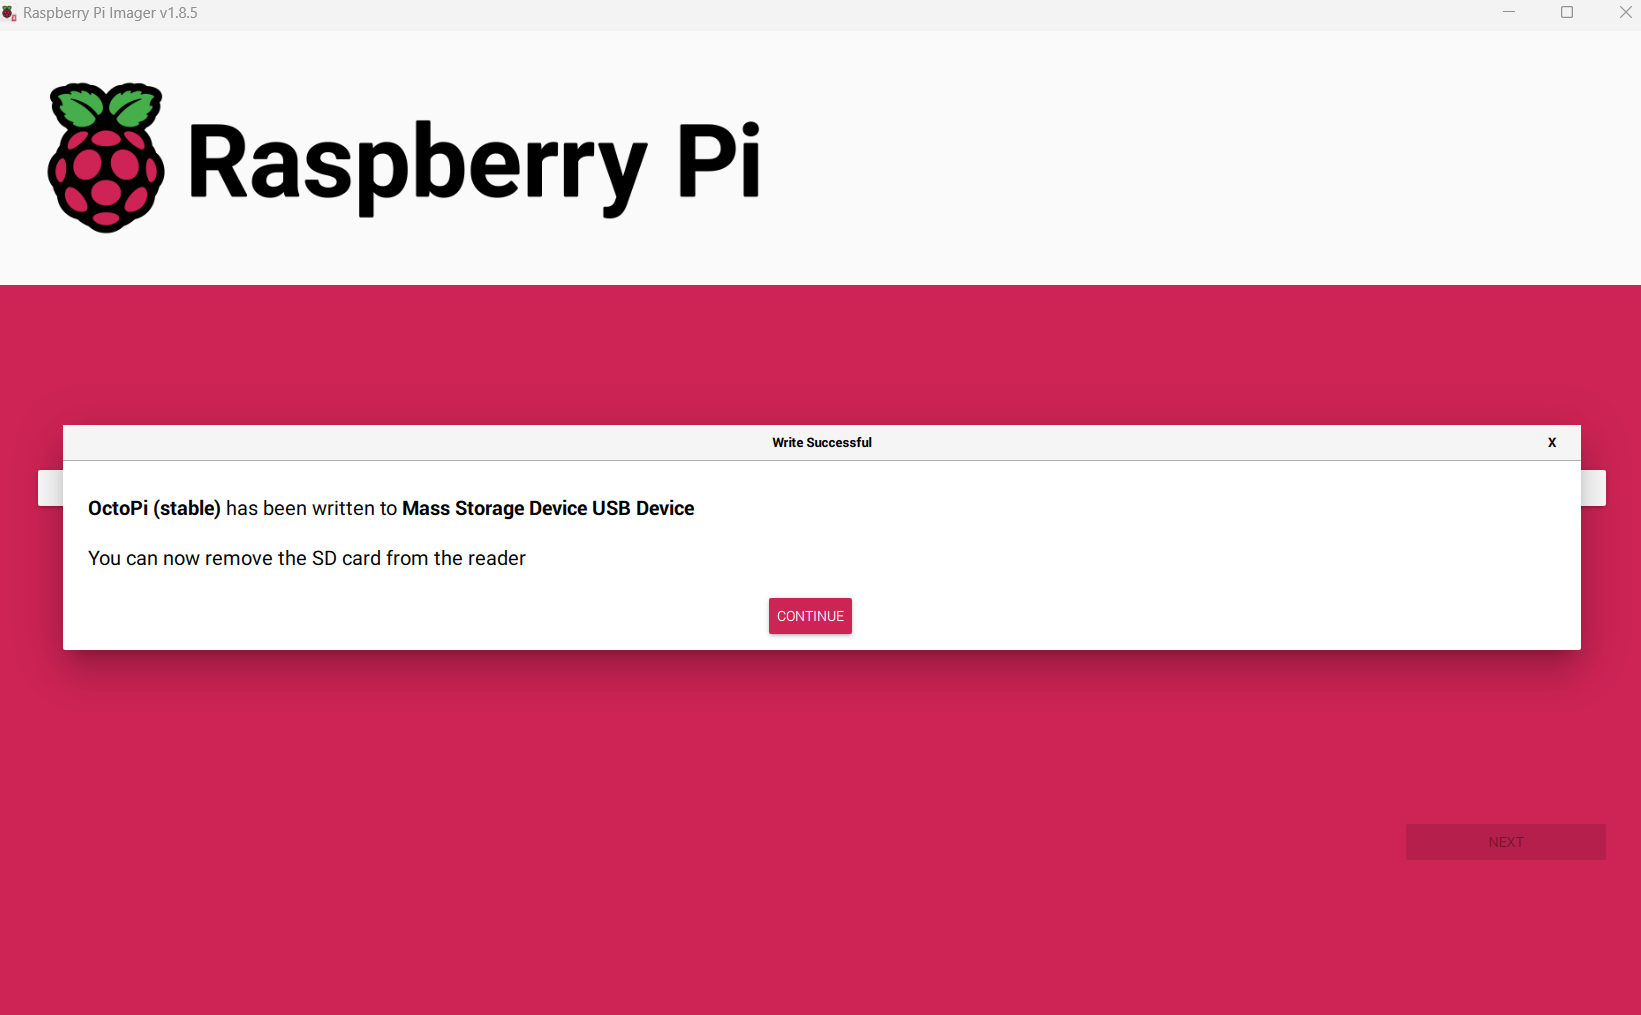
All the data in the SD card will be erased when you proceed. Writing OctoPi will take a few minutes and once complete, OctoPrint and its necessary dependencies will be installed.
9. Click Continue then remove the SD card from your computer.
Installing OctoPrint on Raspberry Pi 5
Installing OctoPrint on Raspberry Pi 5
Currently, there is no stable Octopi distro for Raspberry Pi 5, so you need to use Octoprint_deploy to install it. Octoprint_deploy is a script that provides an easy way to deploy multiple instances of OctoPrint on a single device. Octoprint is intended for managing a single printer in one device, but with this script, you can control several 3D printers from a single machine. You can find more details on the script on GitHub.
Follow the steps below to learn how to install OctoPrint on Raspberry Pi 5 using Octoprint_deploy.
1. Install the latest Raspberry Pi OS on your device. The latest version is based on Debiant 12 ‘Bookworm’. It was released in November 2024.
2. Access the Octoprint_deploy script from GitHub.
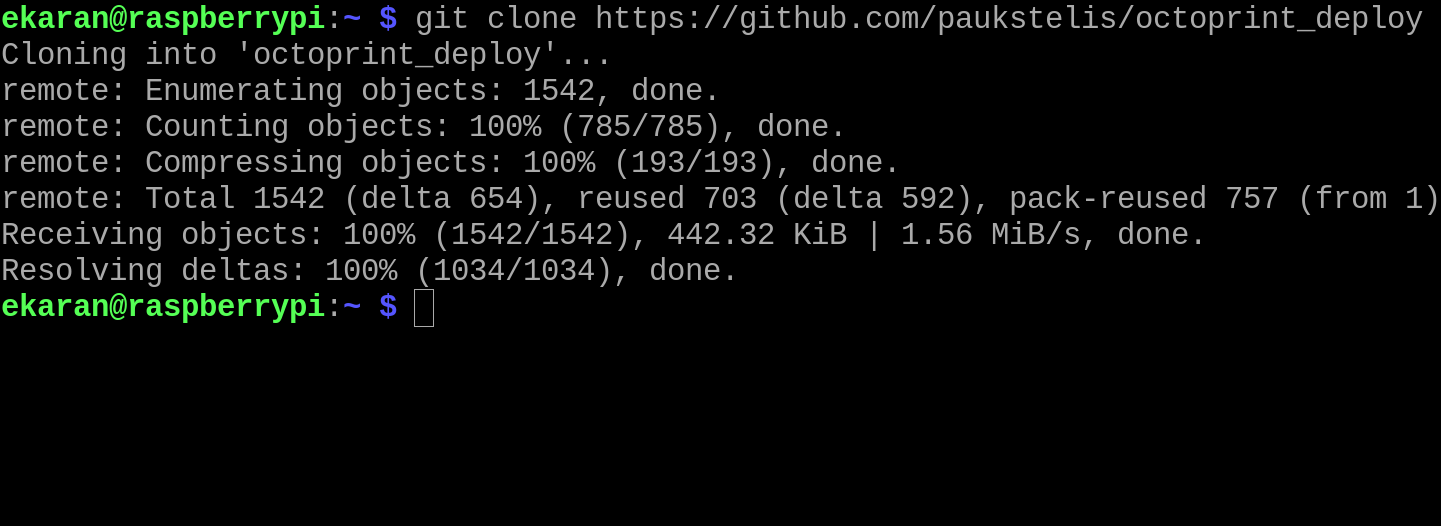
3. Clone octoprint_deploy script by running the command git clone https://github.com/paukstelis/octoprint_deploy.
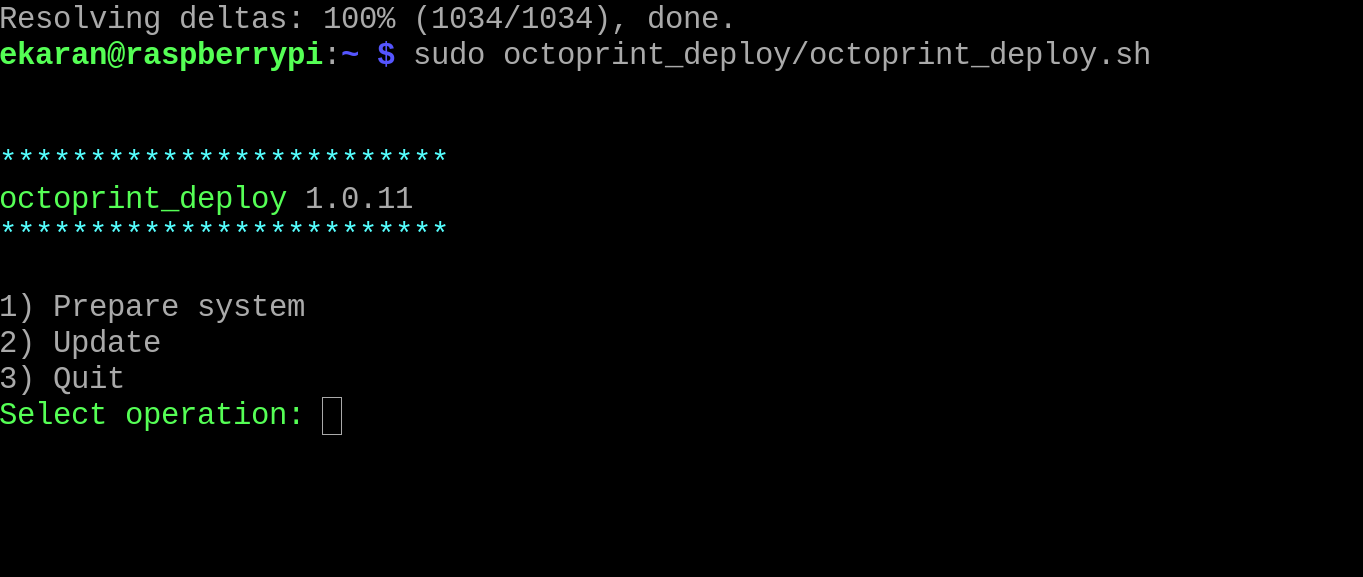
4. Run the command sudo octoprint_deploy/octoprint_deploy.sh. You will see three options: Prepare system, Update, or Quit. Choose Prepare system by typing 1 then click enter.
5. Choose the installation type. Whether Ubuntu 20+, Fedora/CentOS, ArchLinux, or openSUSE.
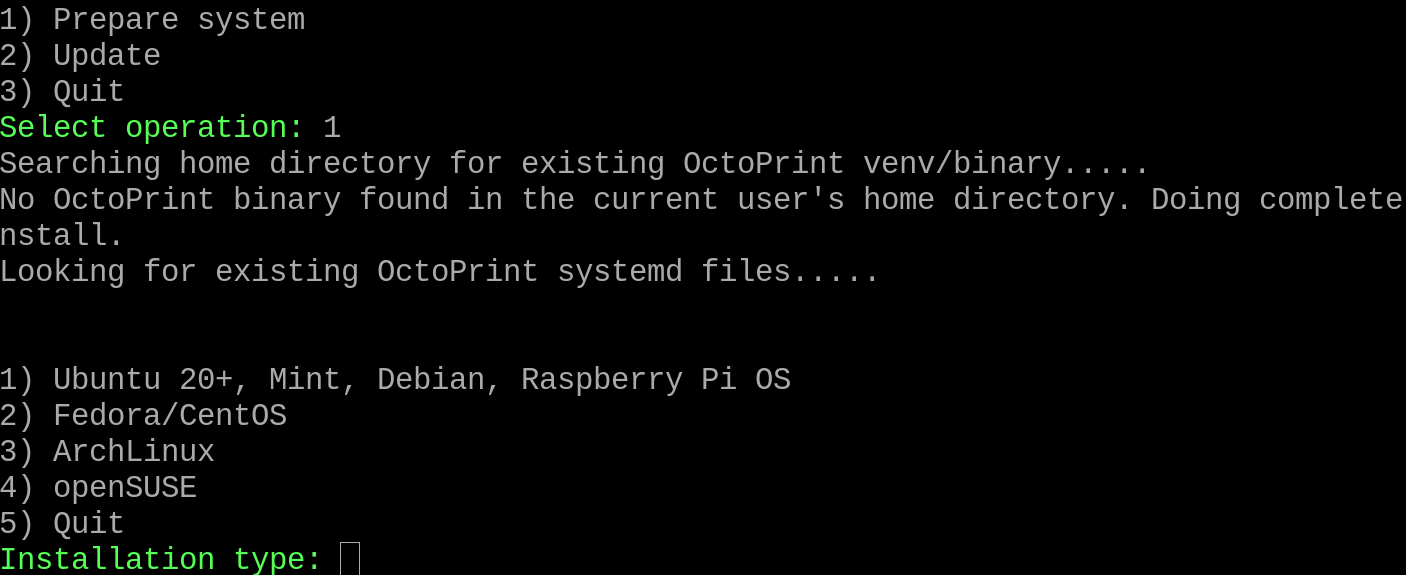
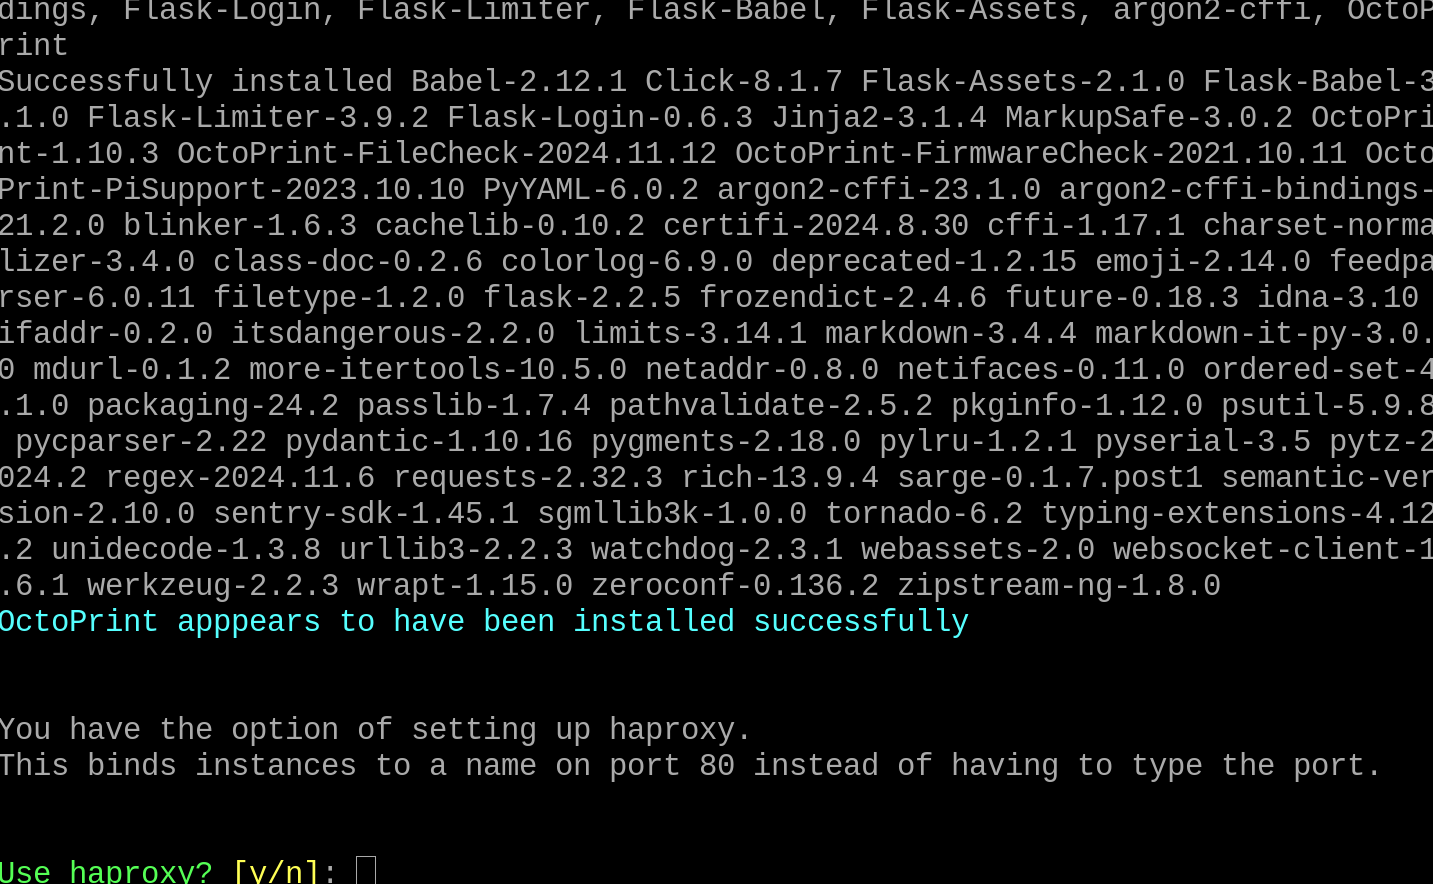
6. Select the first one by typing 1, then proceed. You will be prompted either to accept or reject the installation. When you accept, the necessary packages of Octoprint will be downloaded and installed when you see the sentence: OctoPrint appears to have been installed successfully.
7. Type y then click enter after the Use haproxy? sentence. You will then see an option to install ustreamer or camera-streamer. These will help you stream the videos and pictures from the camera to Octoprint. After selecting 1 for ustreamer, it was successfully installed.
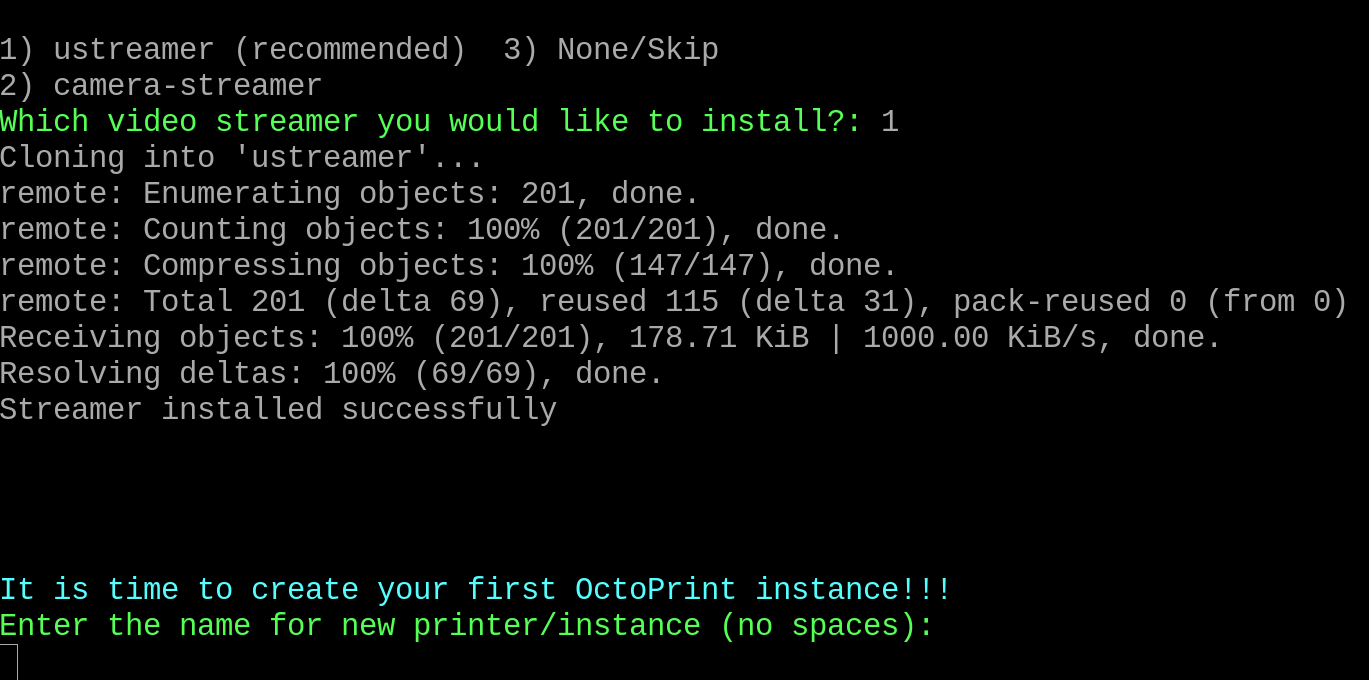
The next step is to create the first OctoPrint instance.
8. Enter the name of your new printer or instance without spaces. For my case I will write Anycubic then accept to begin a new instance creation. Port 5000 will be selected, and you will be given the path to where Octoprint will be installed. In my case, it will be installed at /home/ekaran/.Anycubic.

9. Plug your 3D printer via a USB and you will see the USB address generated or the 3D printer serial number. My USB address is 3-1:1.0.

10. Set up your instance settings. Enter the admin username1234 and password, then accept the first run wizard by typing y, then click enter.
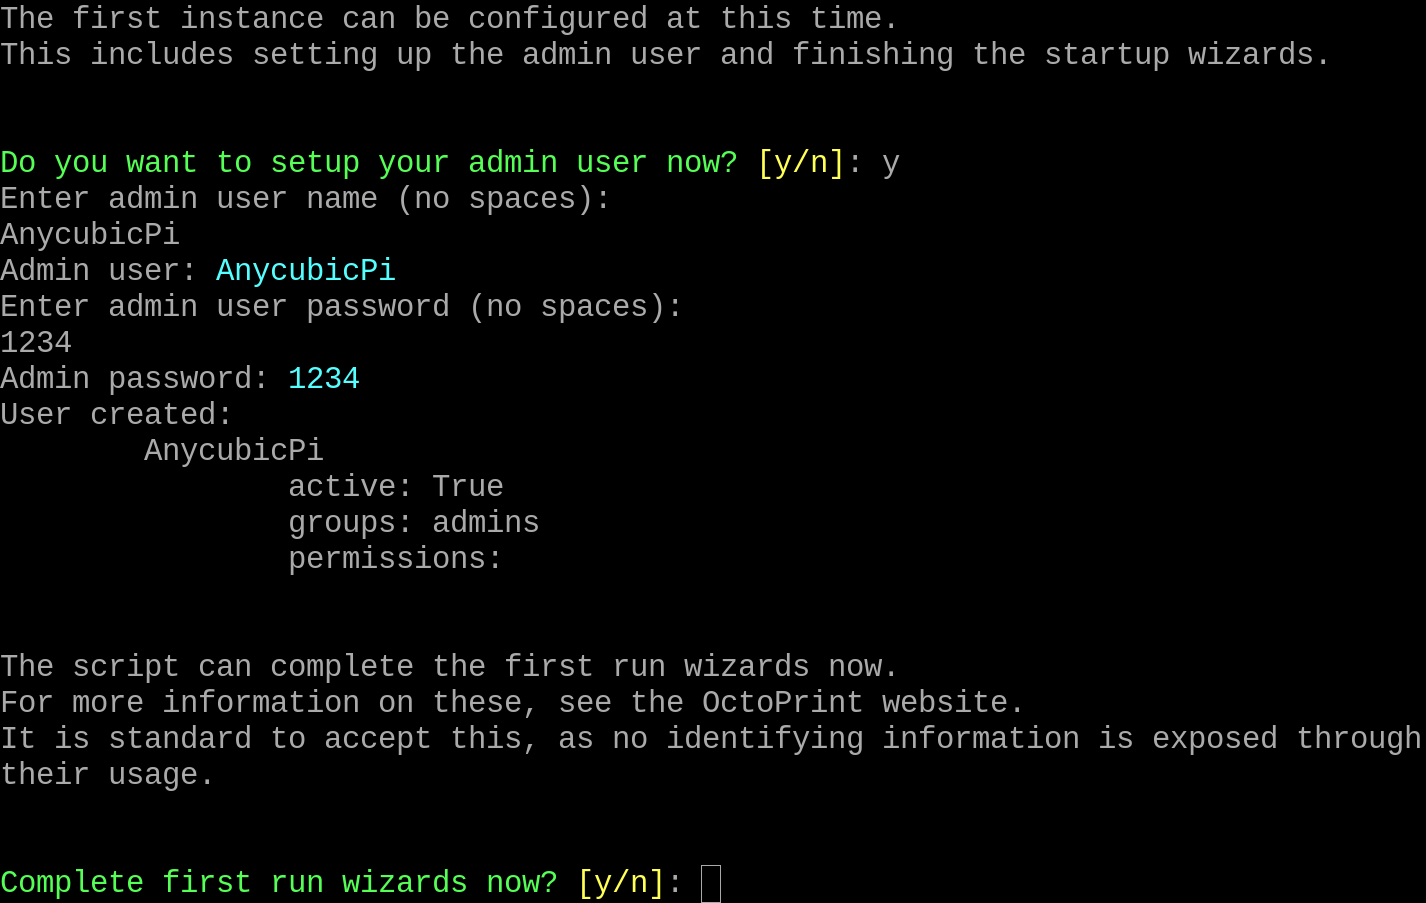
11. Accept to install the recommended plugins. You can either choose to install one or all or quit and then proceed.
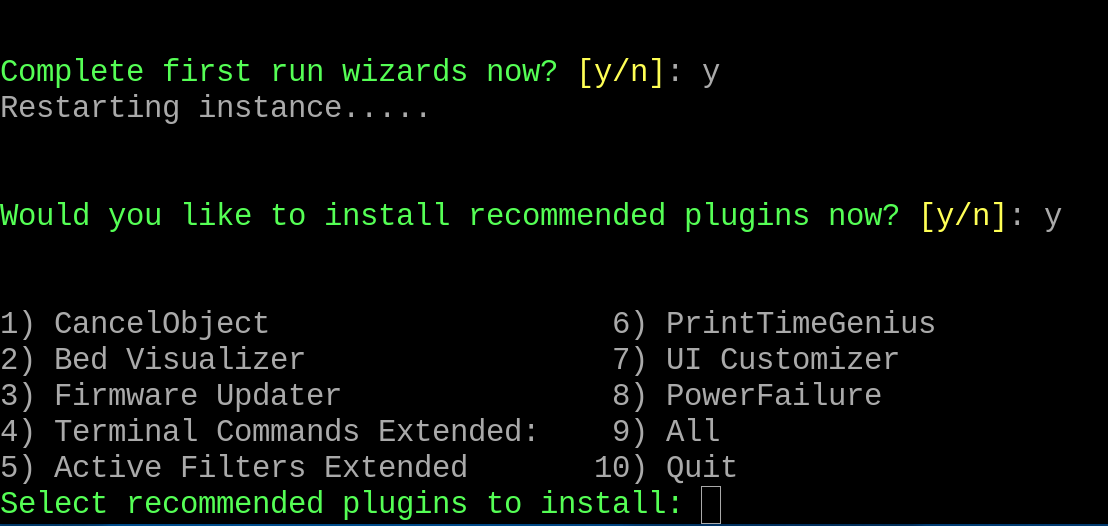
The one that we want is Octolapse. So after installing the above necessary options, we shall later install it individually.
12. You can go ahead and add other instances, USB camera, add picam, delete an instance and even check an instance status, sync users, do USB port testing, and other activities in the Utilities option.
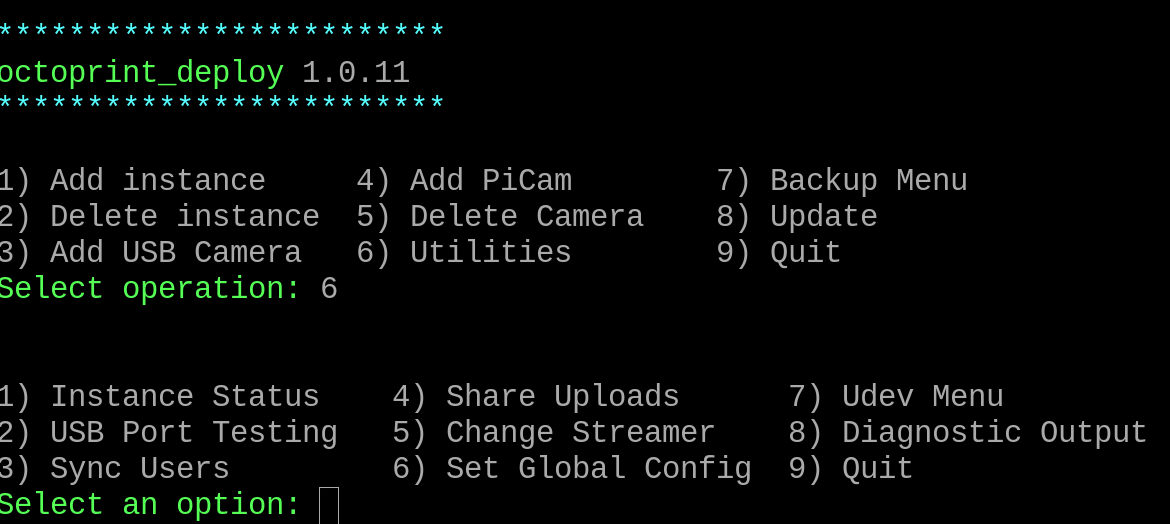
13. Also, choose option 3 to install a USB or DSLR camera settings or option 4 if you are using a Raspberry Pi Camera.
We have now successfully Octoprint on the Raspberry Pi 5 and camera settings.
How to Access OctoPrint on the Web Browser
How to Access OctoPrint on the Web Browser
The next step will be to access OctoPrint on the web to install the Octolapse plugin that we shall use to create time lapses. To do this, follow the steps below.
1. Ensure your Raspberry Pi is connected to your local network.
2. Find your Raspberry Pi’s IP address to connect to the web. You can do this by typing the command hostname -I, and the IP address will be displayed. Mine is 192.168.1.2.

Alternatively, you can hover your mouse on the Wifi icon, and it will display the address.
3. Open any browser on a device connected to the same network as your Raspberry Pi.
4. Type the Raspberry Pi’s IP address followed by port 5000. For example, http://192.168.1.2:5000. You will see a page launching where you can log in using the username and password you set up earlier when installing OctoPrint.
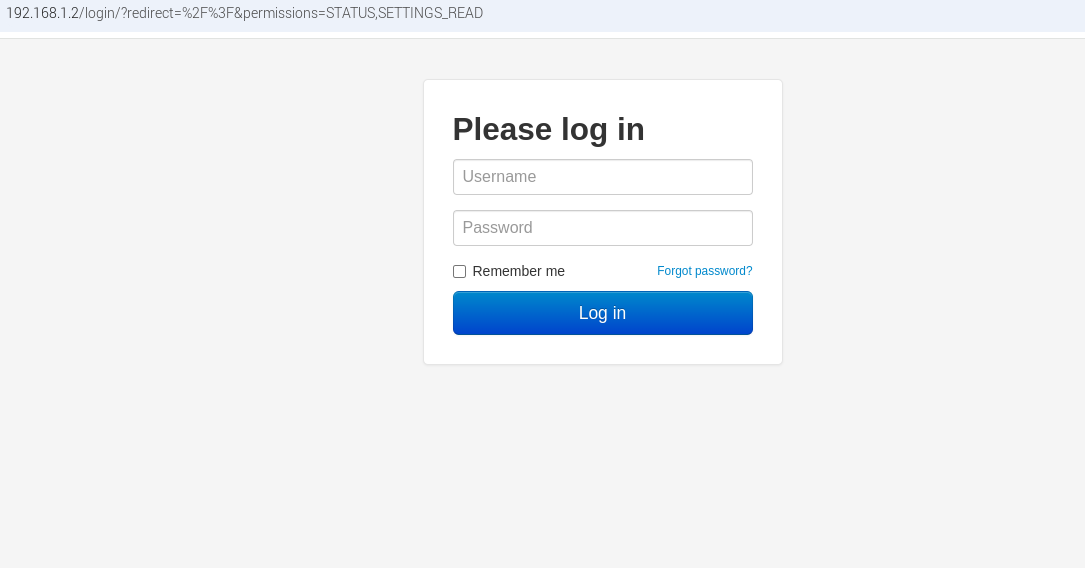
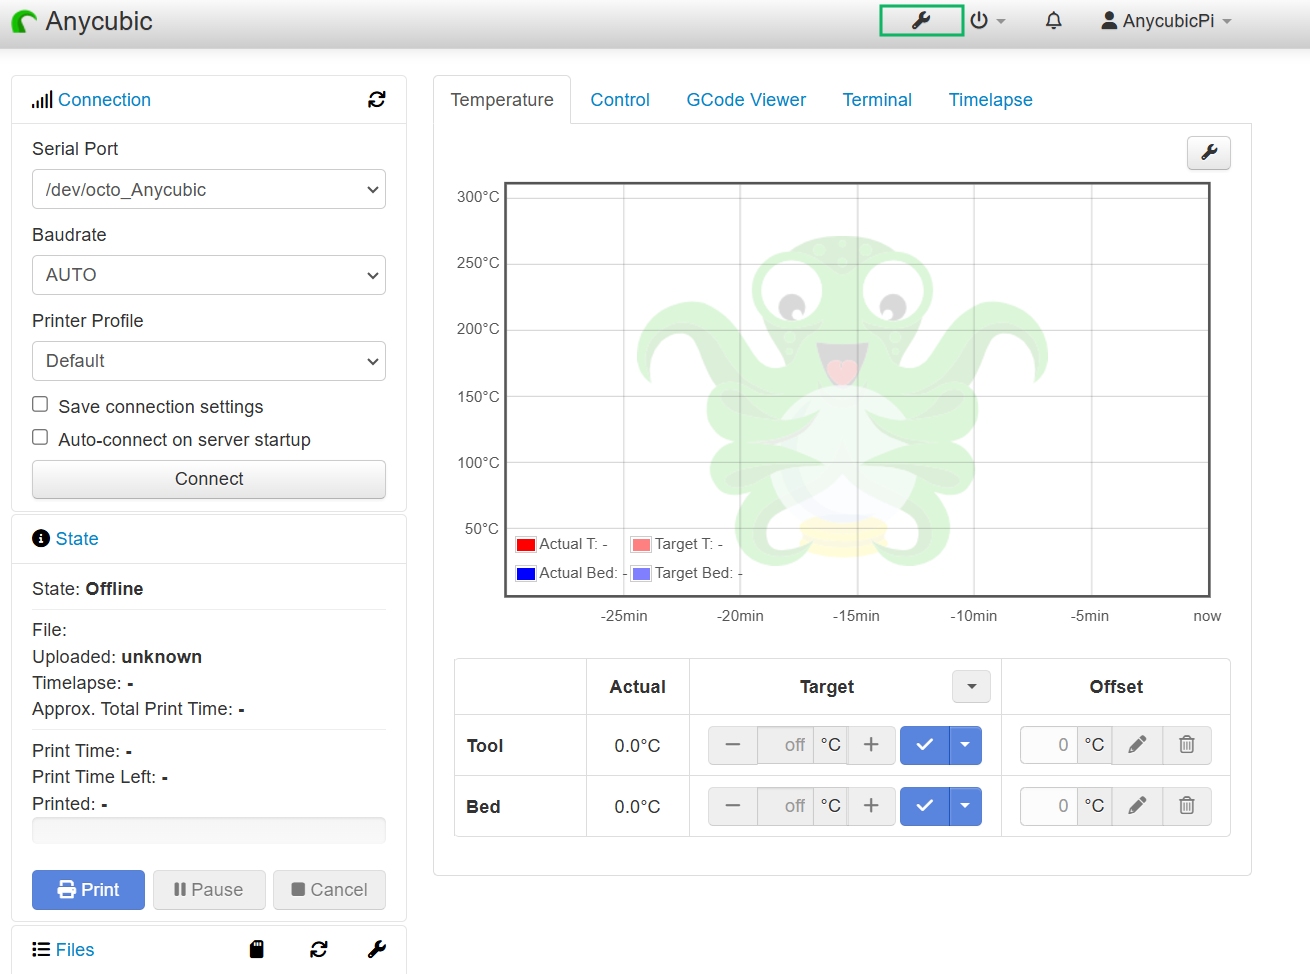
5. Click Log in to access the OctoPrint interface, as shown below.
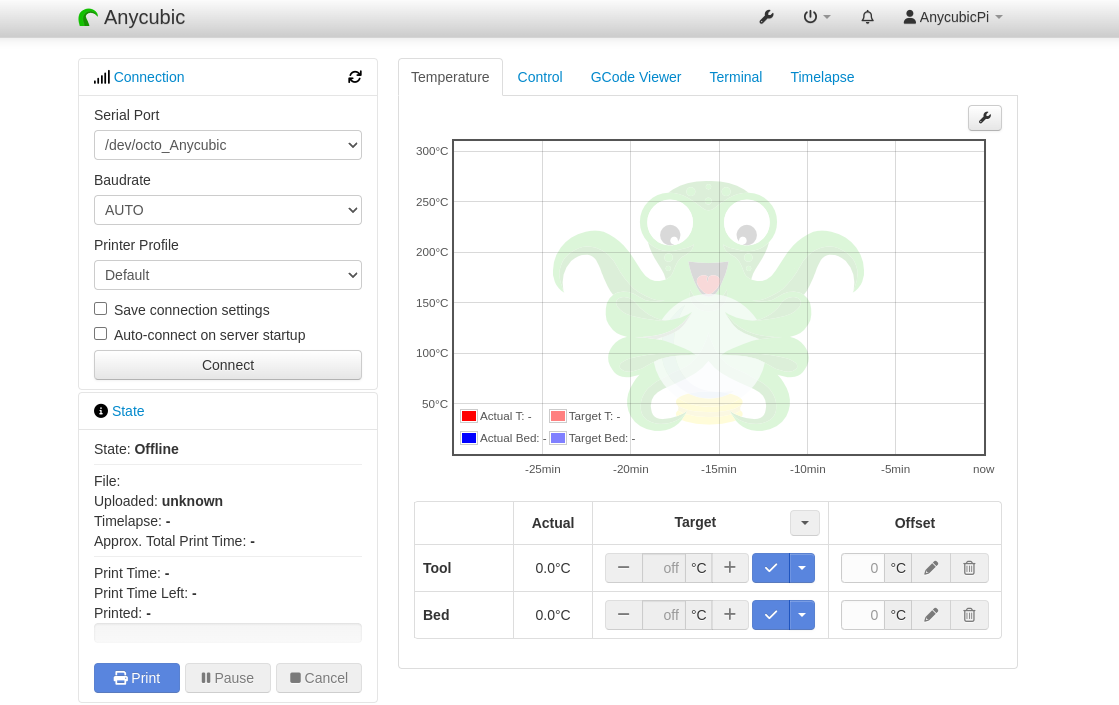
6. Install Octolapse plugin by clicking on the wrench icon found on the top section.
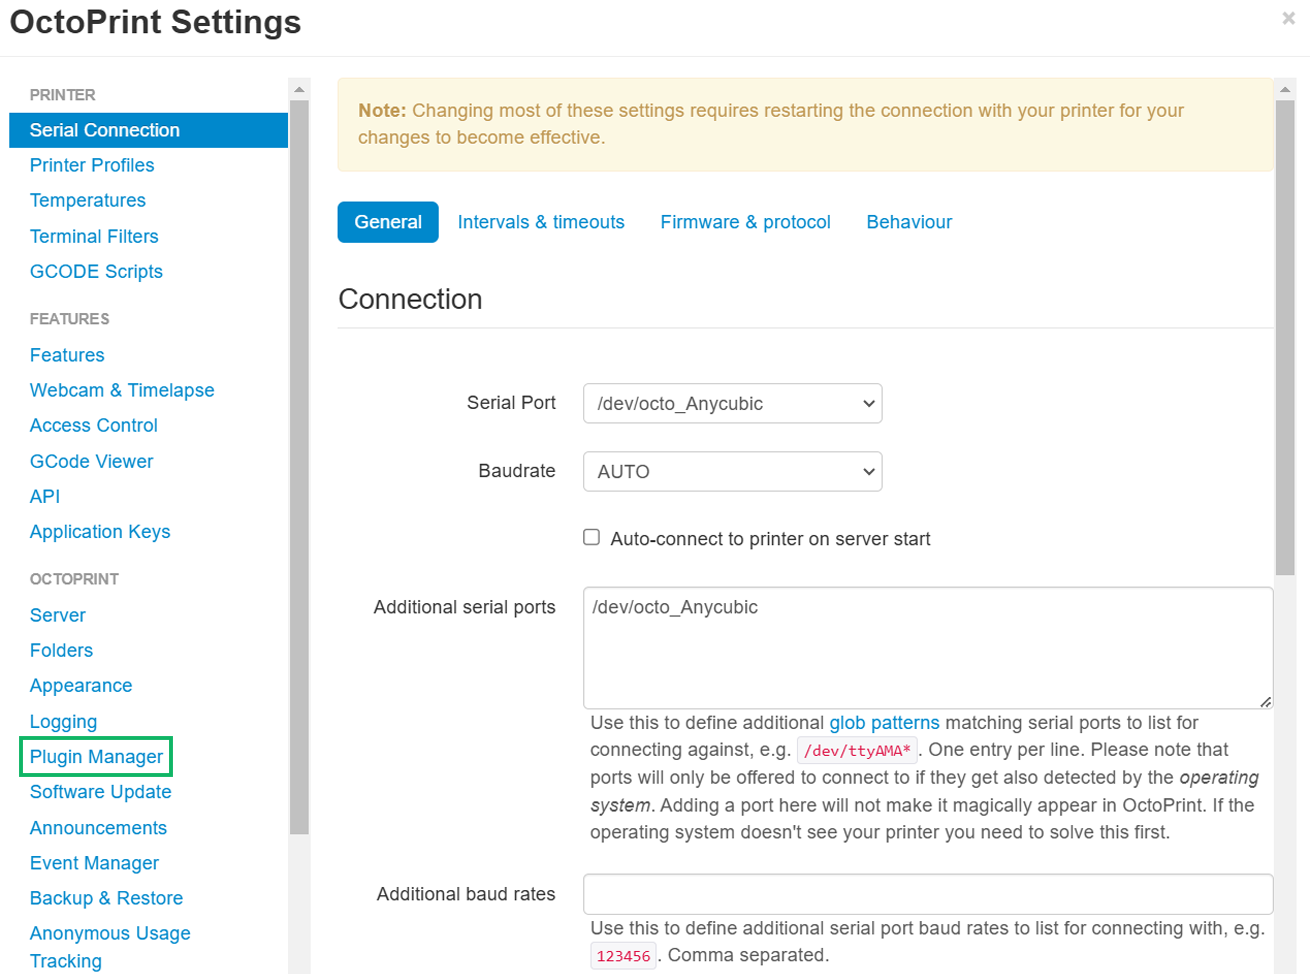
7. Select the Plugin Manager option under OCTOPRINT settings.
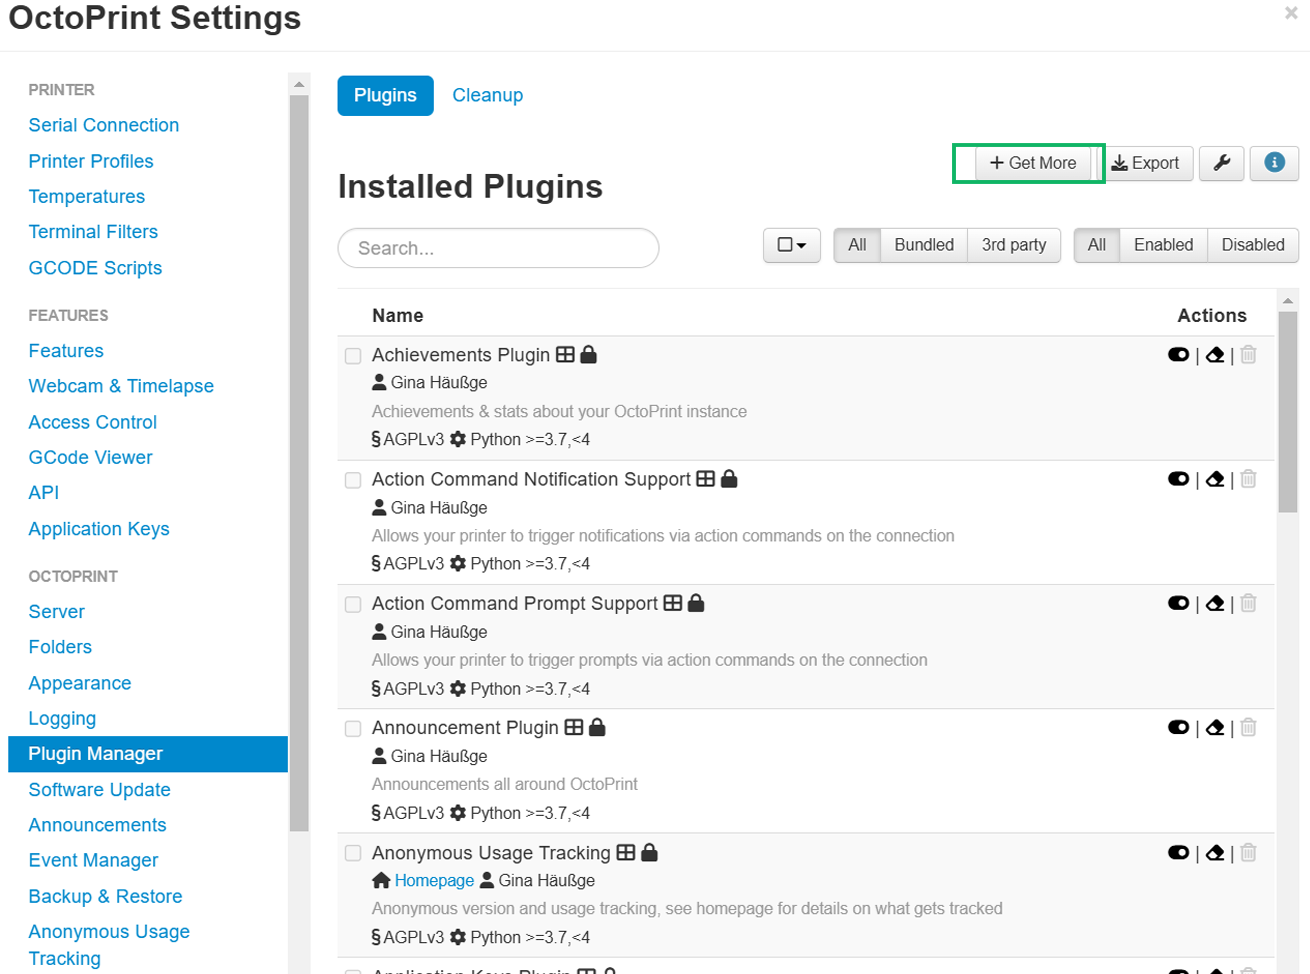
8. Click Get More and you will be prompted to enter your password to authenticate.
9. Search for Octolapse in the search bar, then click Install.
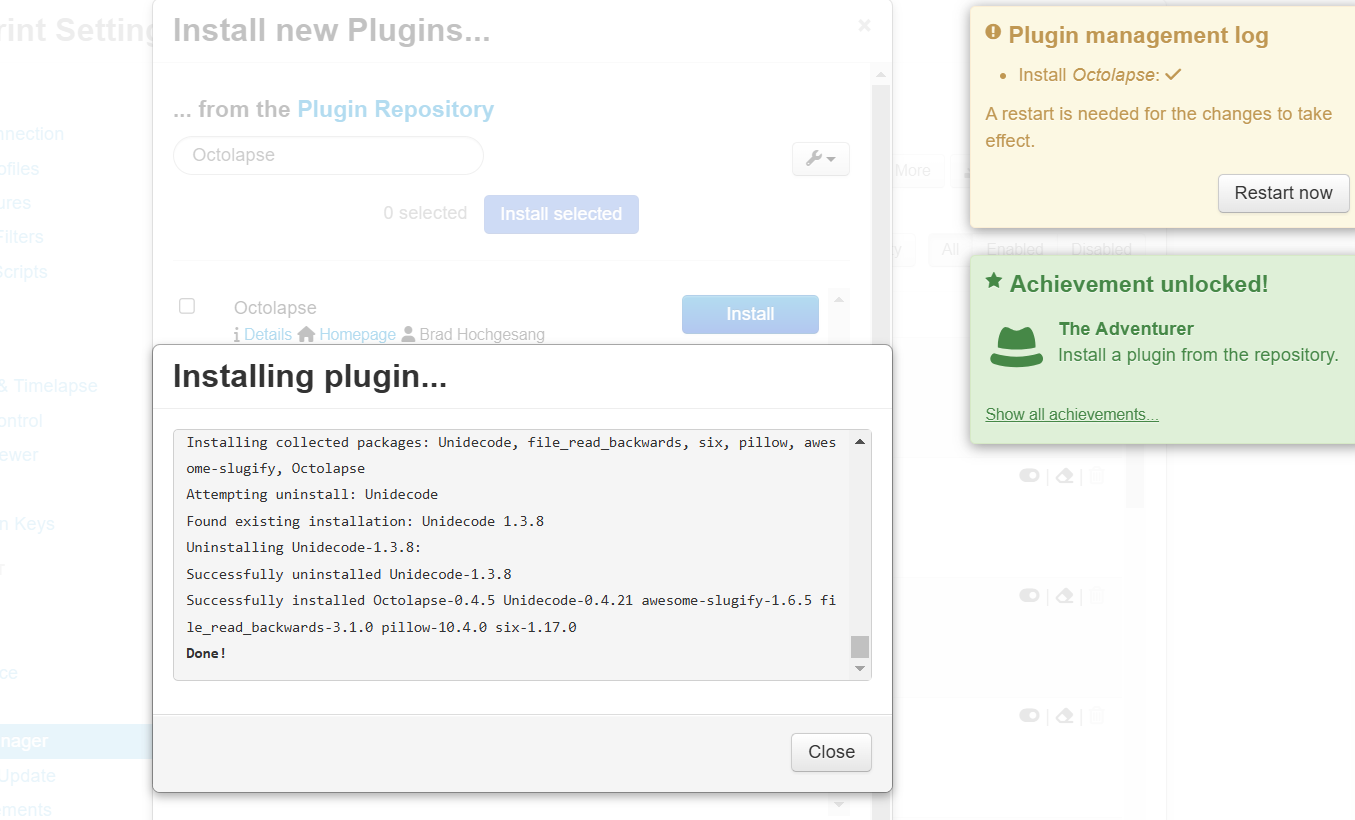
10. Restart Octoprint for the changes to take effect.
11. Go back to the settings menu and click Octoplase under plugins.
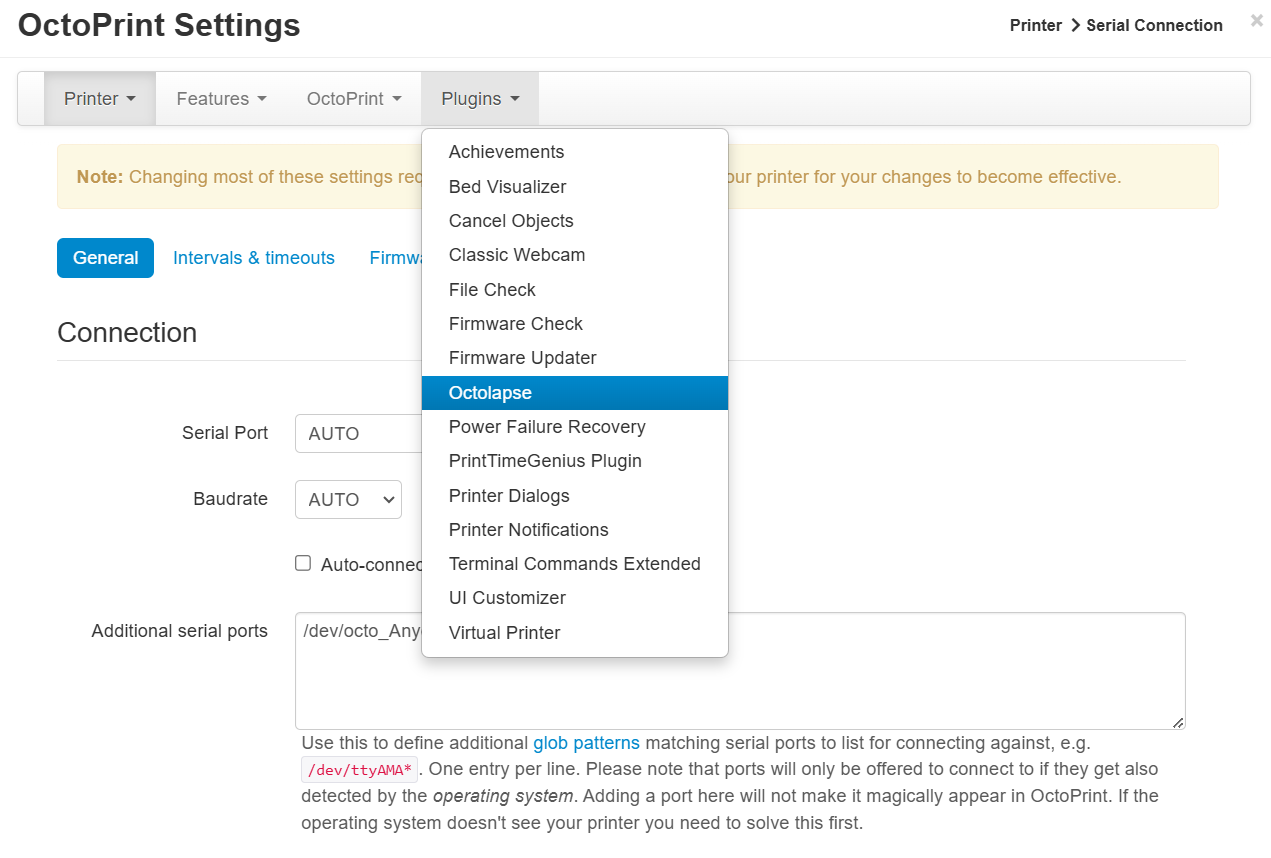
12. Create a 3D printer profile before starting a timelapse. You can do this by clicking Add Profile on the Printer section and add your details.
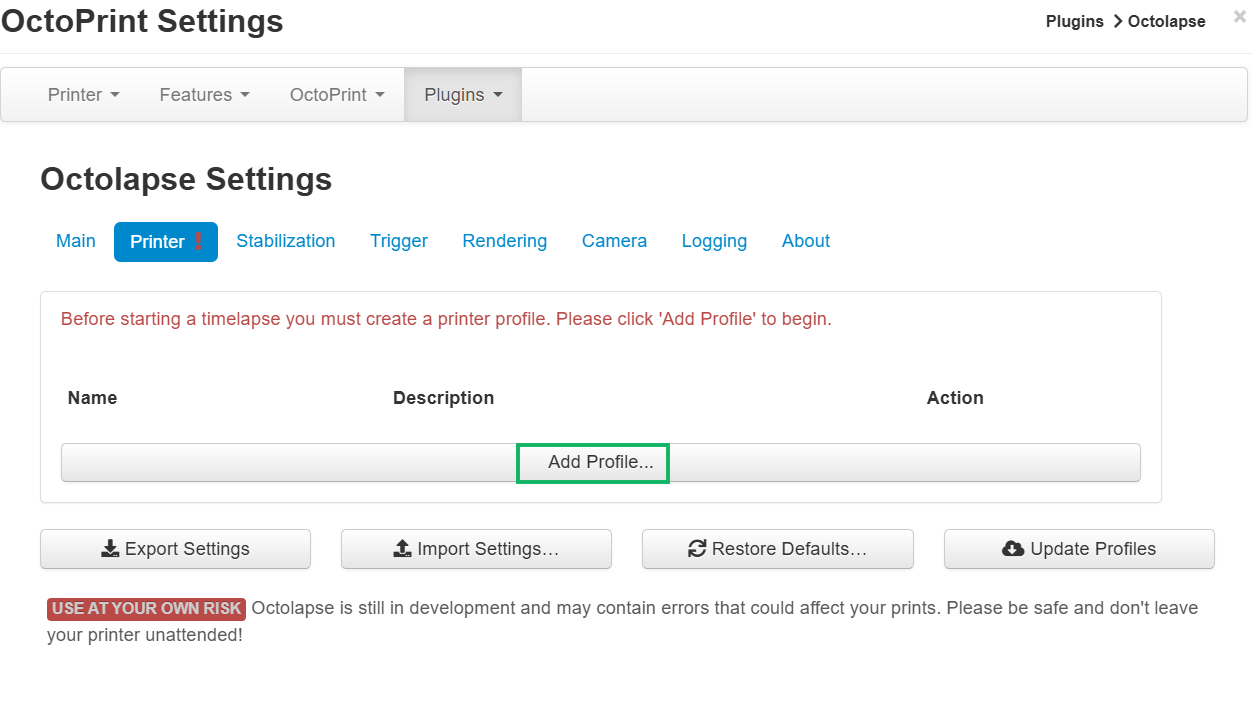
You should now be able to see and control your 3D printer on OctoPrint. Try to move the X, Y, and Z axis to make sure your 3D printer responds. If it’s not responding, ensure it’s connected at the left side of the interface in the Connection section.
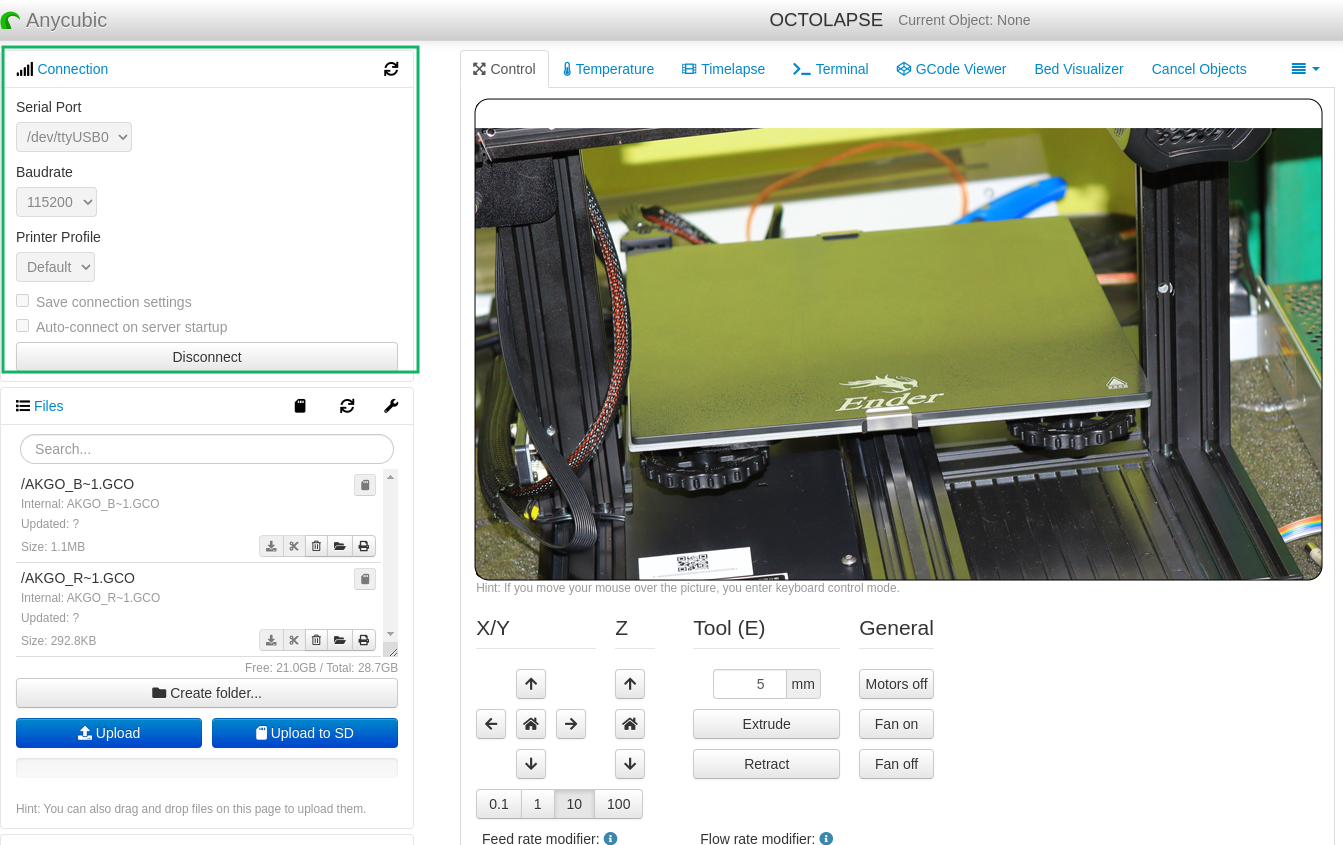
13. Go to Octolapse, and then you choose the camera to use and how it will be triggered.
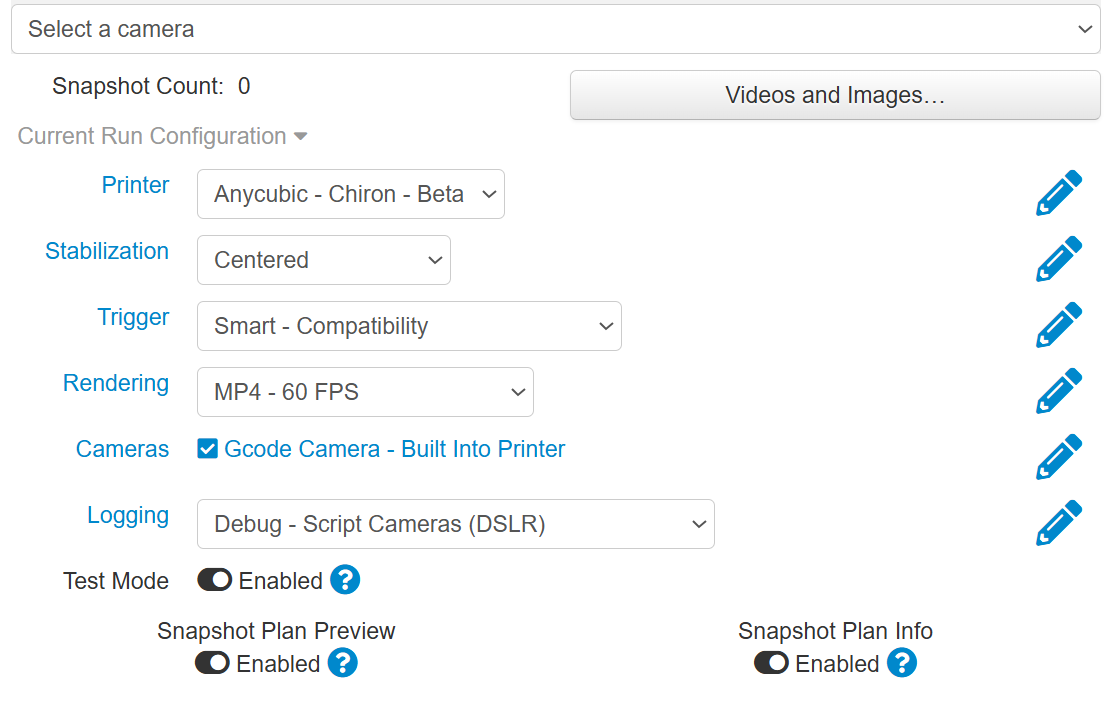
14. Ensure that you enable test mode before you start Octolapse. This is important as it will help you prevent extrusion, allowing you to do the testing without wasting filament.
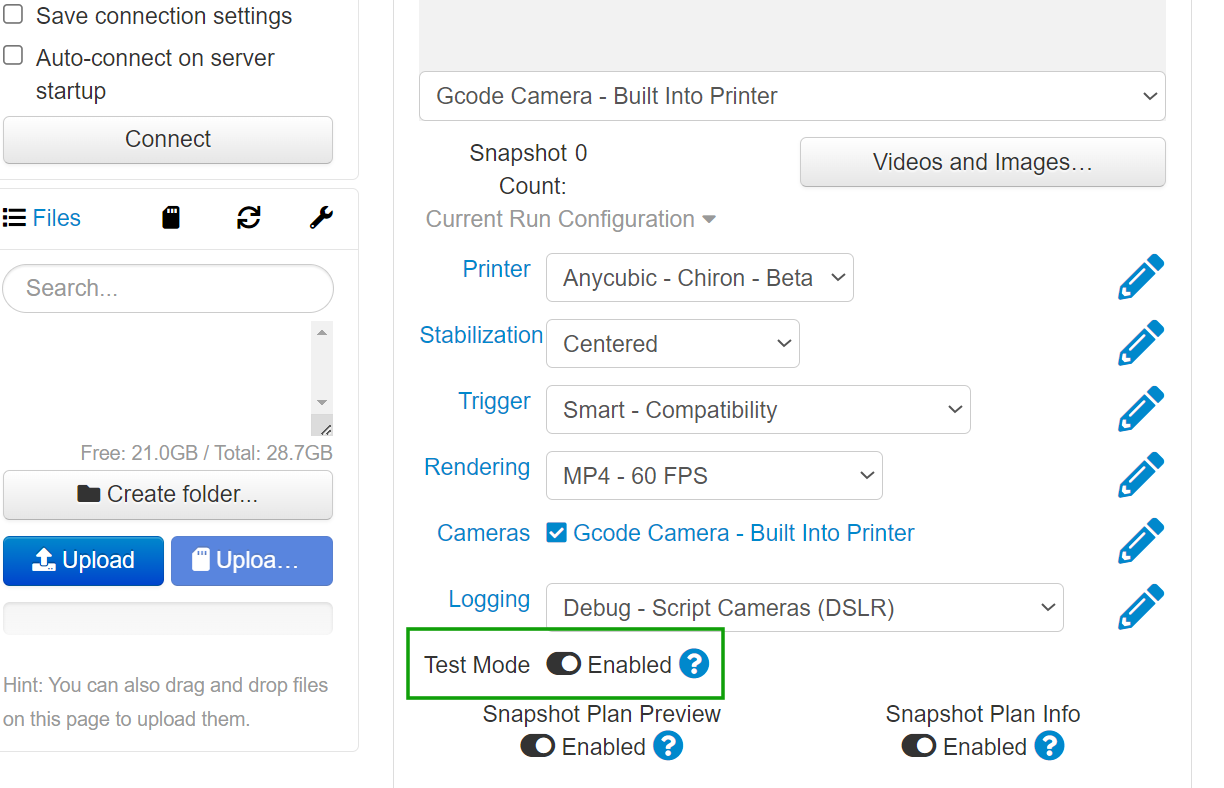
When 3D printing, you can check snapshots in the videos and images section.
15. Upload your file from the left section of the interface by clicking Upload.
16. Click Print to start 3D printing. Then go to Timelapse section to see your timelapses. Ensure in the Trigger section, you use one of the Smart triggers so that you can see the snapshots in real-time. You can stop Octolapse without stopping the 3D printing process if anything goes wrong.
After creating the timelapse, there is an option to preview, delete, and even download them.
Using a DSLR Camera to Create Timelapses
Using a DSLR Camera to Create Timelapses
If you have already installed OctoPrint and Octolapse and you had not installed camera dependencies during the installation process, follow the steps below:
1. Set up your DSLR camera on a tripod stand. Ensure it’s stable and pointed at your 3D printer in a way that captures the print from the desired angle.
2. Connect the camera to your Raspberry Pi using a USB cable. You will then need Gphoto2 to control the camera. Alternatively, you can also connect Raspberry Pi using a remote shutter trigger.
3. Install gphoto2 by first running the command sudo apt update.
4. Run the command sudo apt-get install gphoto2. This will enable you to trigger the camera.
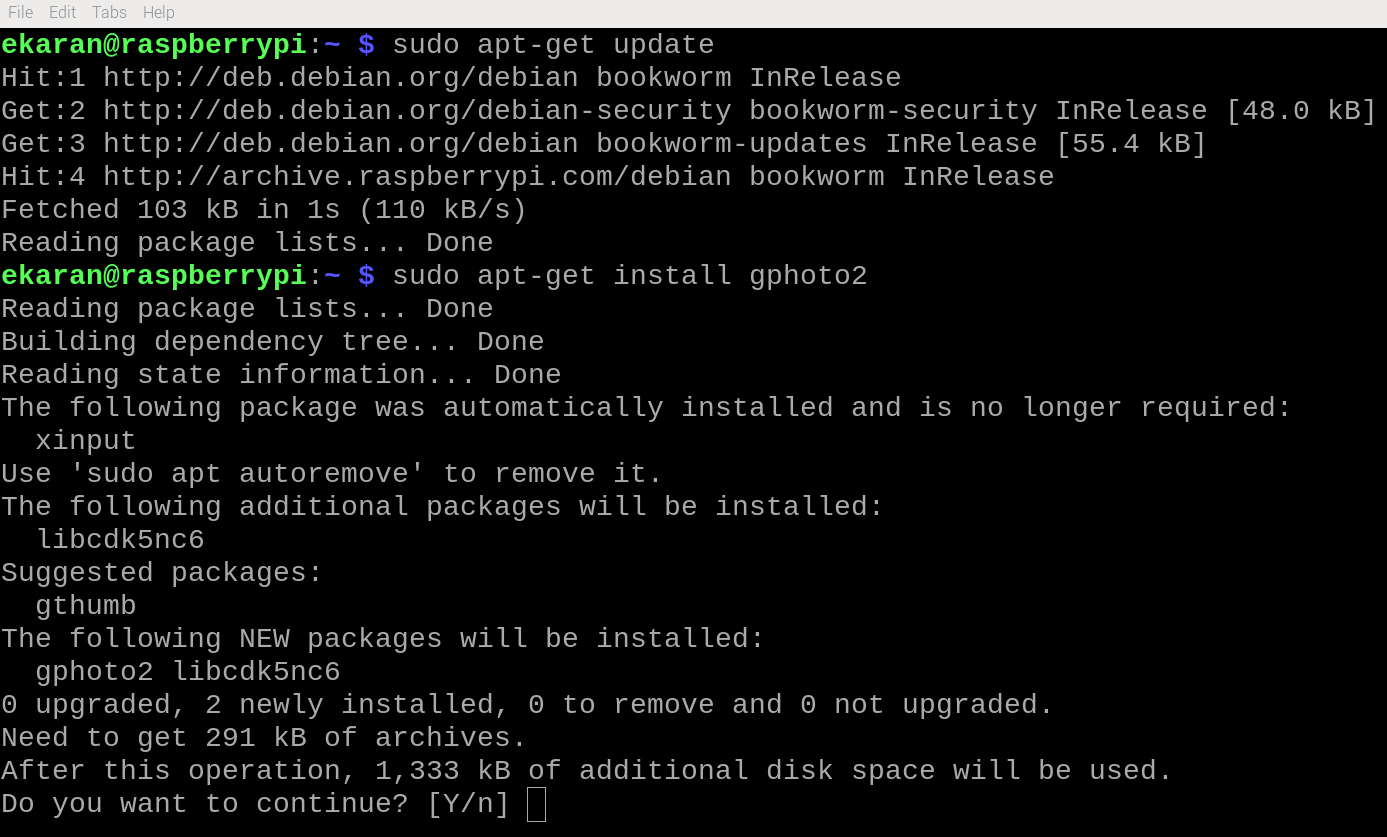
5. Accept to continue by typing Y, then click enter, and it will start processing the triggers.
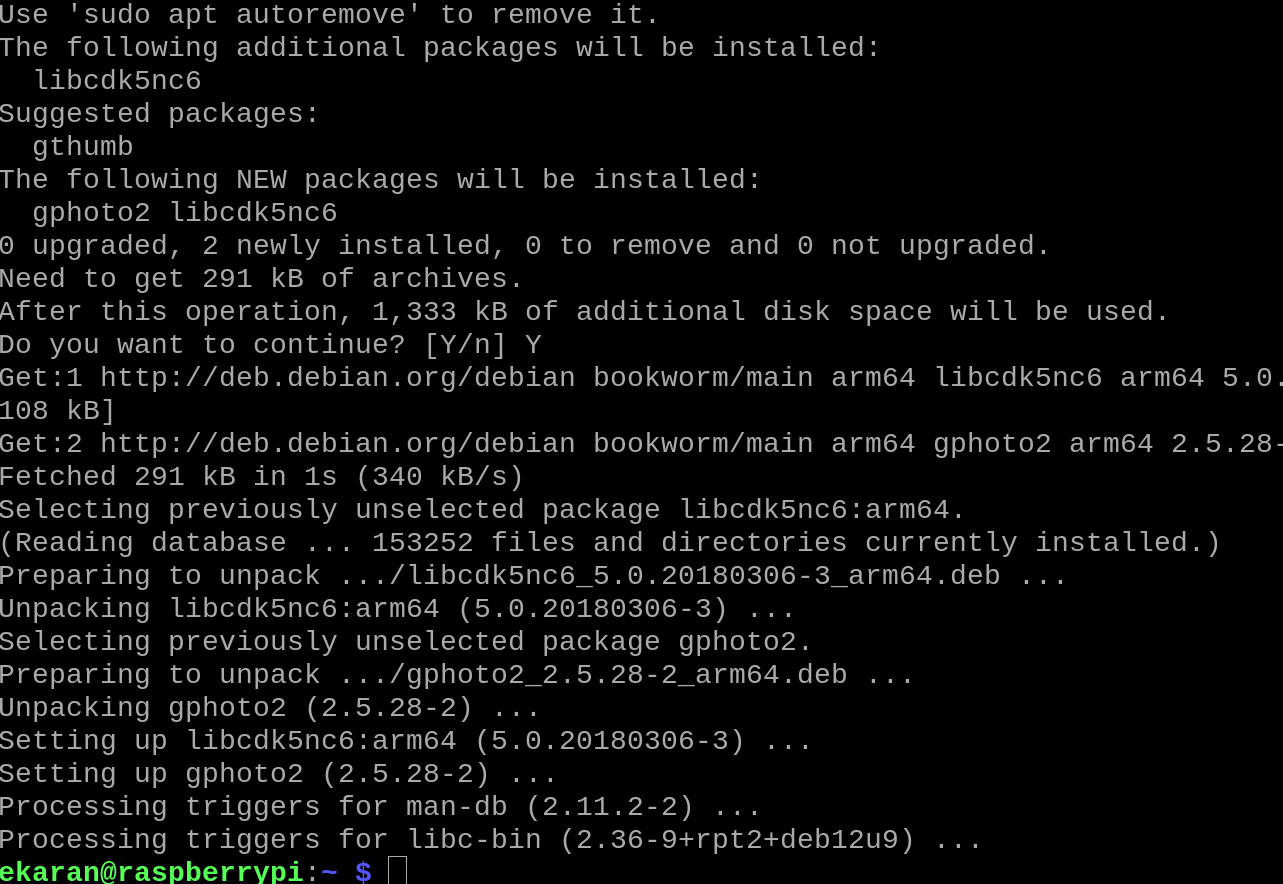
6. Confirm it’s installed by typing the command gphoto2 then enter. It should give you a list of many ways to use it.
7. Check if your camera is detected using the command gphoto2 – -auto-detect, which should give you a few details about your camera. Also, check out the list of cameras supported by gphoto2 to see if yours is listed.
6. Configure Octolapse to use your DSLR by clicking on the wrench icon to open the settings, then go to the Plugin Manager > Get More and search for the GCode System command and install it. It helps enter G-code commands and execute them.
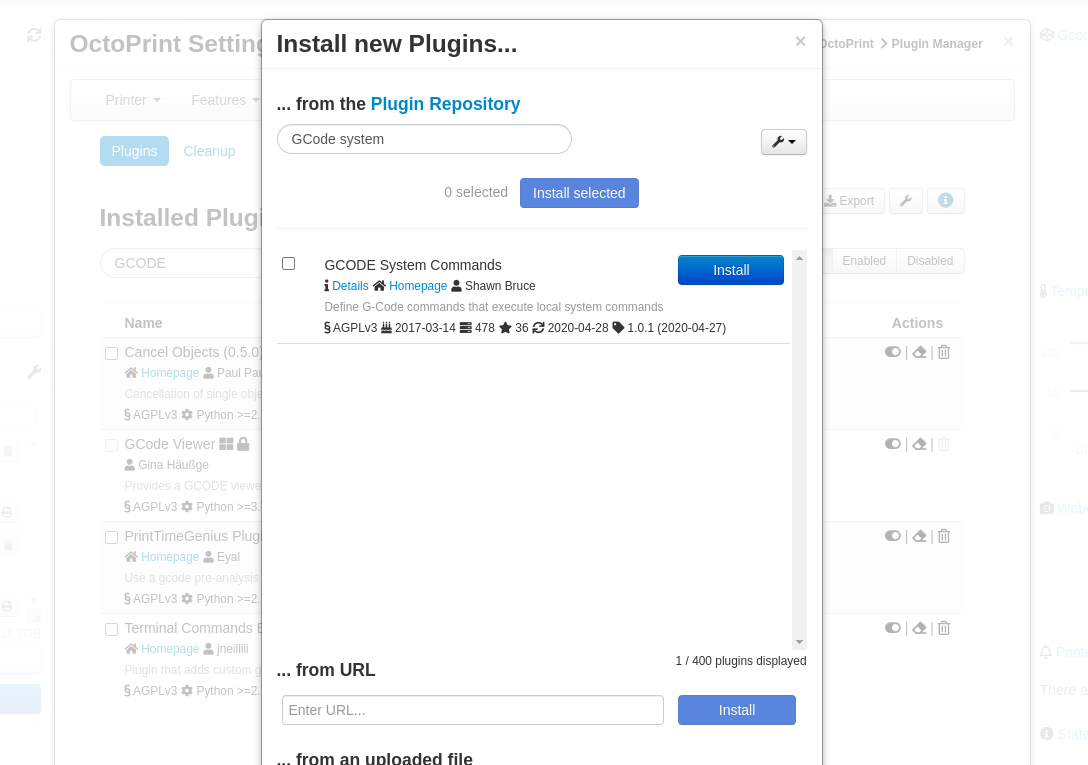
7. Restart OctoPrint then go to the settings section and choose GCODE System Commands then click the plus sign to add a new command then type gphoto2 –auto-detect –set-config capturetarget=1 –trigger-capture, then save.
8. Go to the terminal tab on Octoprint once your camera is on and your 3D printer is connected, then ensure it’s working. You can do this by sending a command like OCTO1.
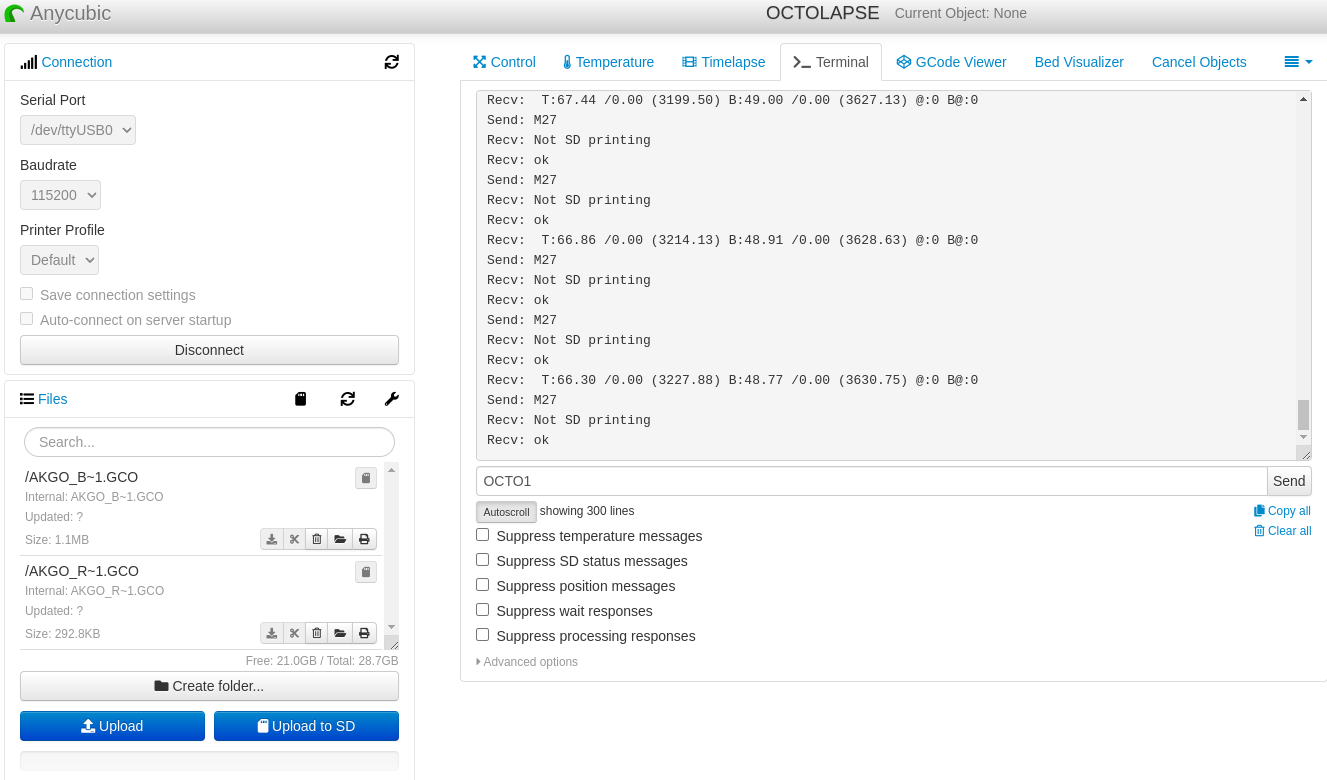
9. Upload your file and start taking timelapses.
How to Create a 3D Printing Timelapse Using Cura and a DLSR Camera
How to Create a 3D Printing Timelapse Using Cura and a DLSR Camera
This is one of the simplest ways that you can use to create 3D printing timelapses. It involves capturing images or video frames at specific intervals throughout the 3D printing process and then compiling them into one quick video showcasing the progress of the print from start to finish. You don’t need to use a Raspberry Pi or Octoprint. You only need a camera and stand, camera trigger, and Cura plugin for creating timelapses. Follow the steps below to learn how to do it.
1. Download the files for the remote trigger for the camera to 3D print. You can get them from Myminifactory. This is used to hold the remote shutter. You can buy the remote shutter from Amazon.
2. 3D print the camera trigger with additional supports, then attach them to your 3D printer and place the remote shutter on it.
3. Download Custom timelapse Cura plugin from Github.
4. Go to Cura, then Help > Show Configuration Folder.
5. Find the Cura Script folder, place the timelapse plugin there, and restart Cura. Alternatively, you can also use the Cura built-in timelapse plugin. Check the next step to install it.
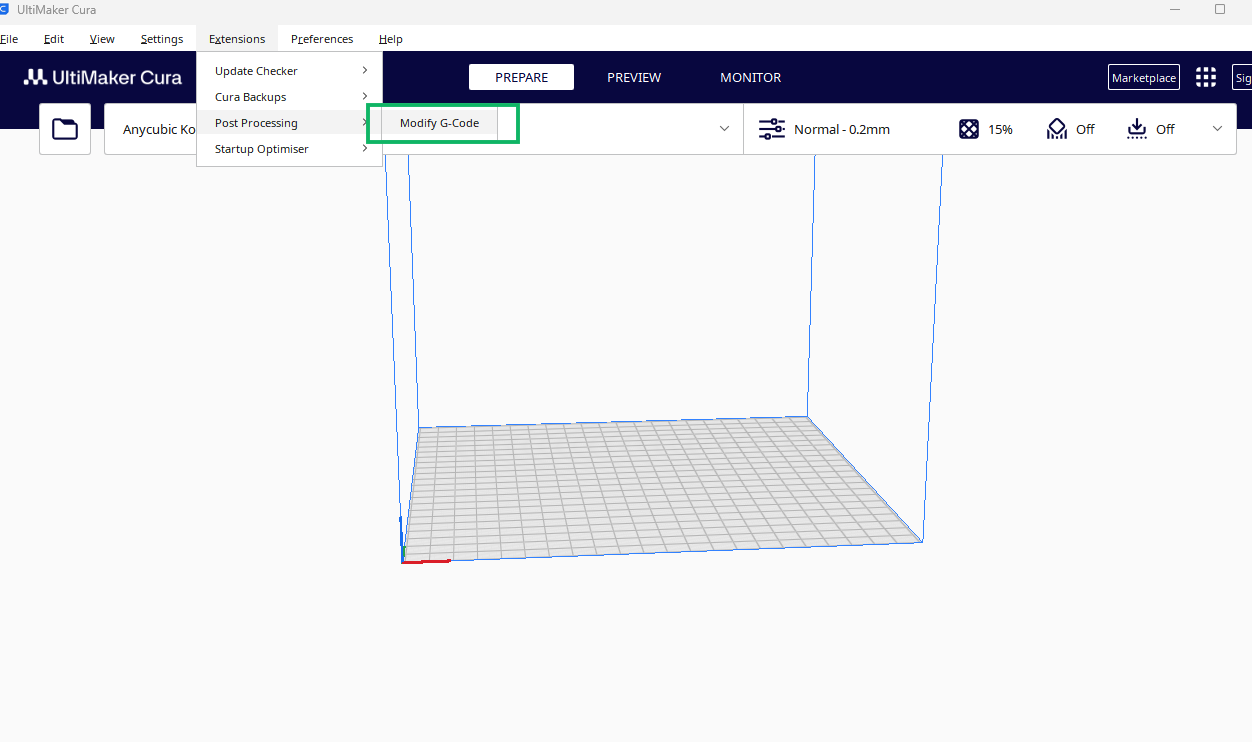
6. Go to Extensions > Post Processing > Modify G-Code in Cura.
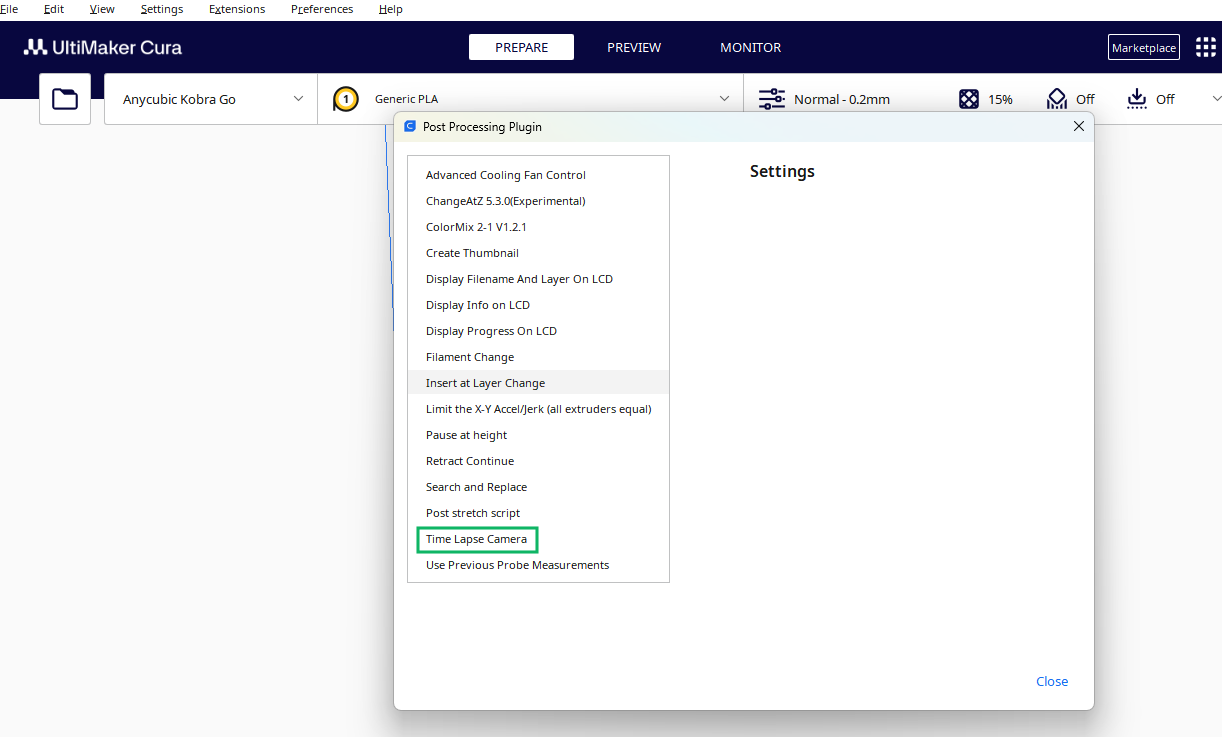
7. Click Add a script, then select Time Lapse Camera
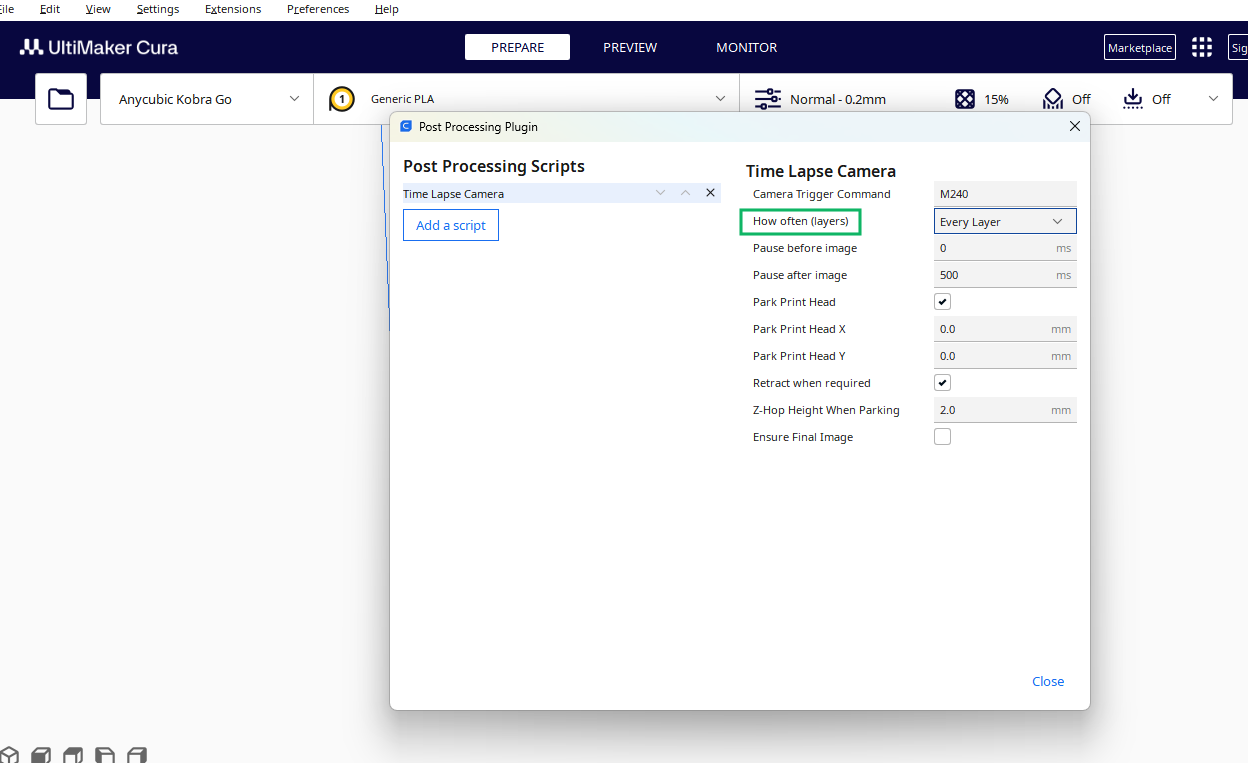
8. Retain the default settings in the window that launches. But you can adjust how often layers are captured in the How often (layers) section, then click Close.
9. Home your 3D printer, then move the X axis until it touches the trigger you installed earlier.
10. Import your 3D model to Cura, then slice. You should see a notification below the interface showing that the timelapse script is active.
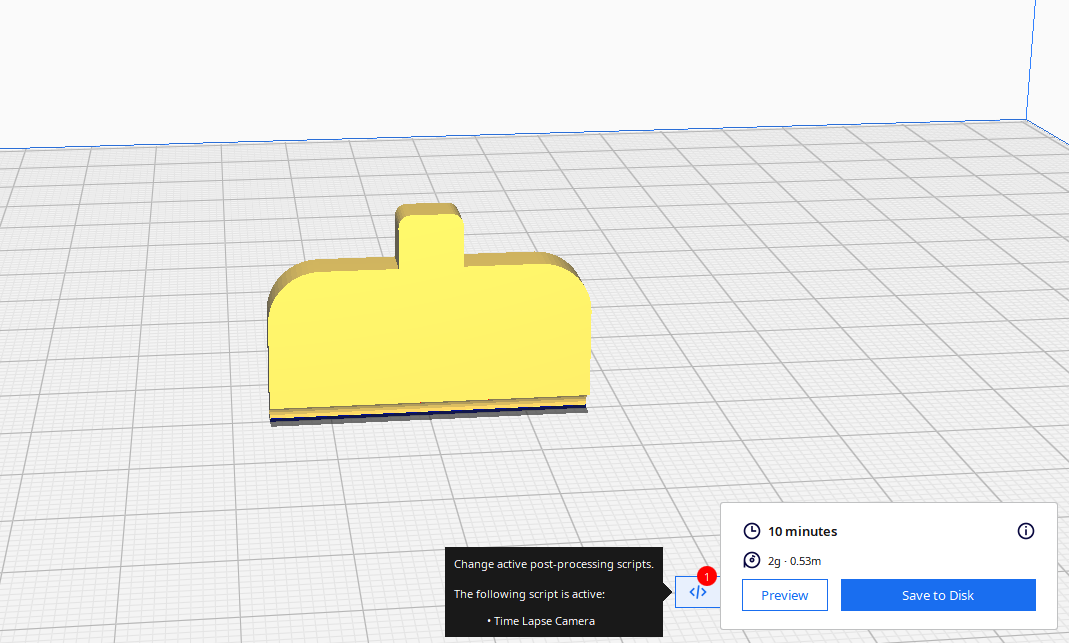
If you were using the custom plugin downloaded from Myminifactory, you can access it in the plugins section, too, and you will be given the option to modify it.
11. Start 3D printing and recording your timelapses. When you finish, import images or videos to an editing software like Adobe Premier Pro and adjust the speed and other effects before exporting it.
You can also use a phone or iPad camera with Cura to create timelapses. You will need to use a remote camera shutter specifically for phones like the remote shutter for Android and iPhone. Properly mount it to your 3D printer. If you use an iPad or iPhone, you can download and 3D print a Timelapse iPad clamp to properly mount the camera shutter. It is specifically meant for Ender 3 V2 but can also work on other 3D printers with a few adjustments.


